Select Domains from the left-hand menu, then enter your subdomain and click on Add Domain.
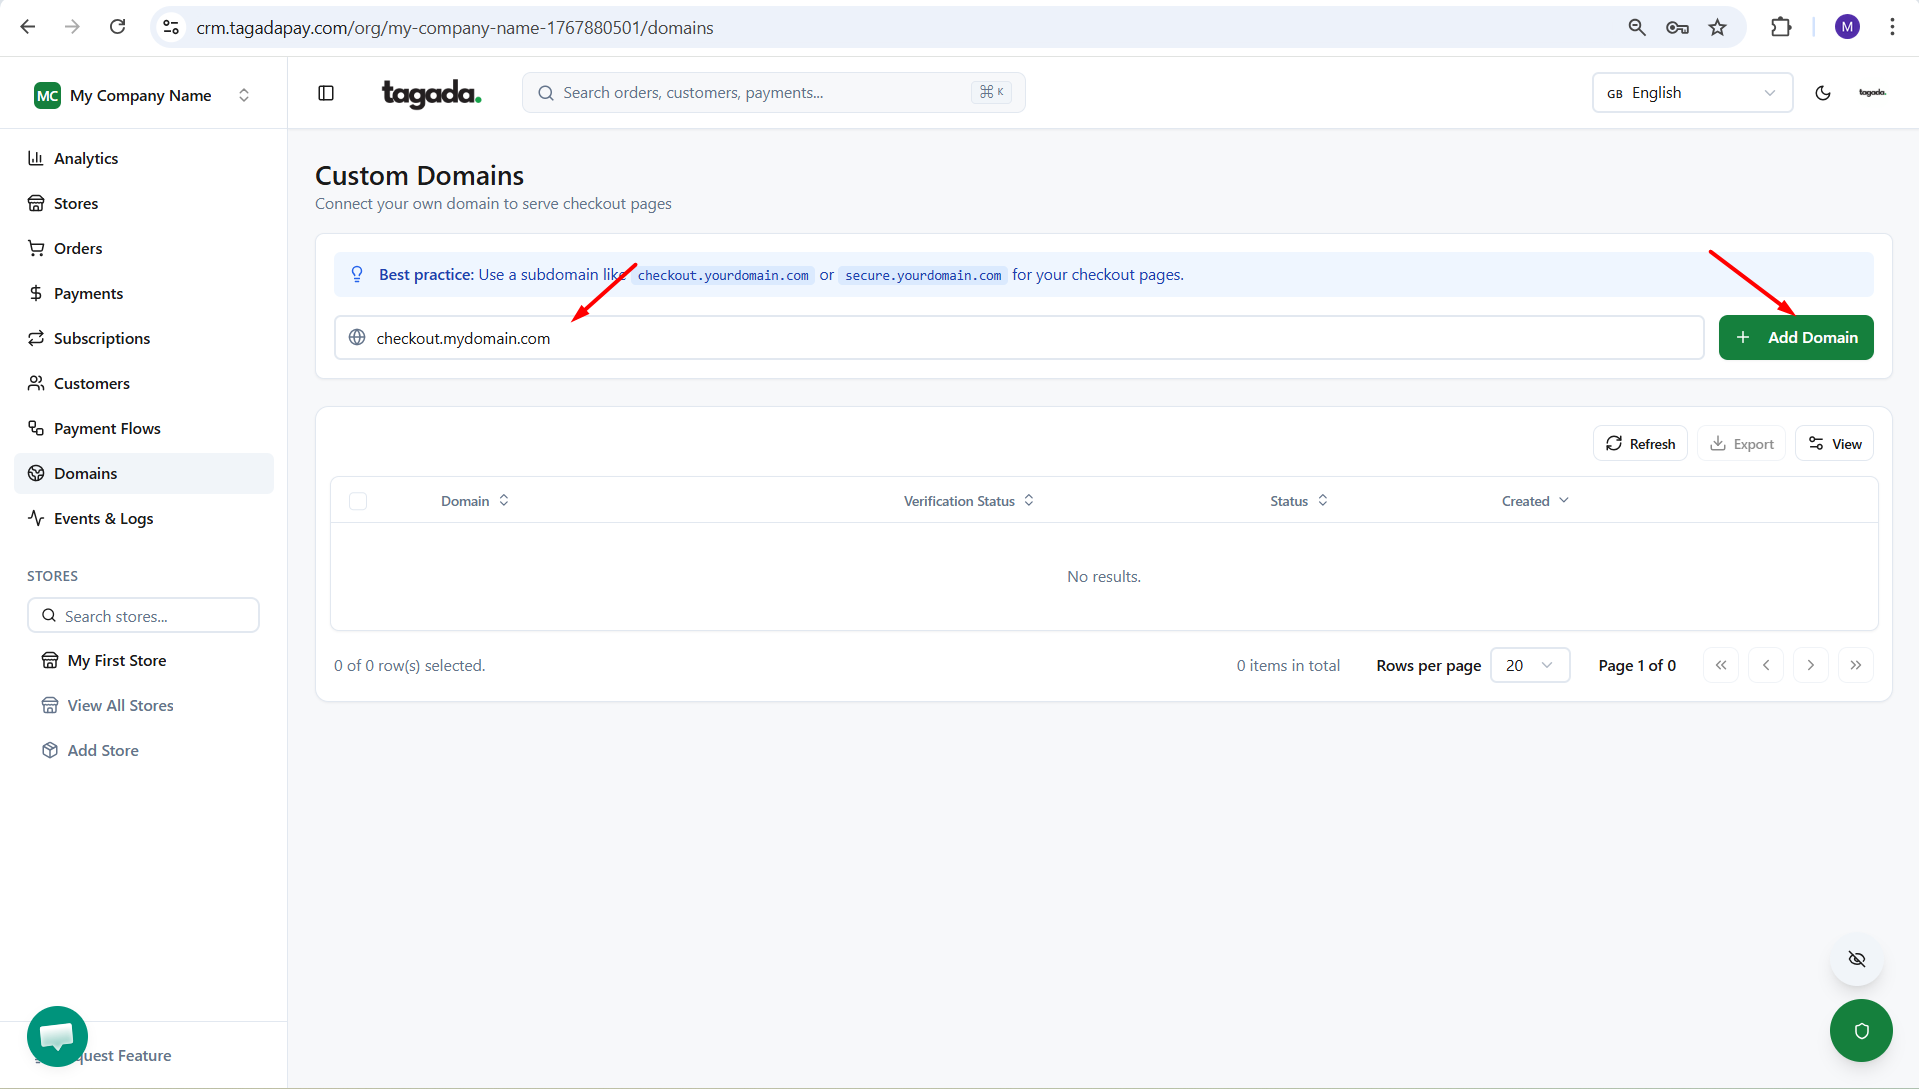
Note: You can only add a subdomain. This means you can choose a custom prefix for your store’s domain, but the rest of the URL must remain the same.
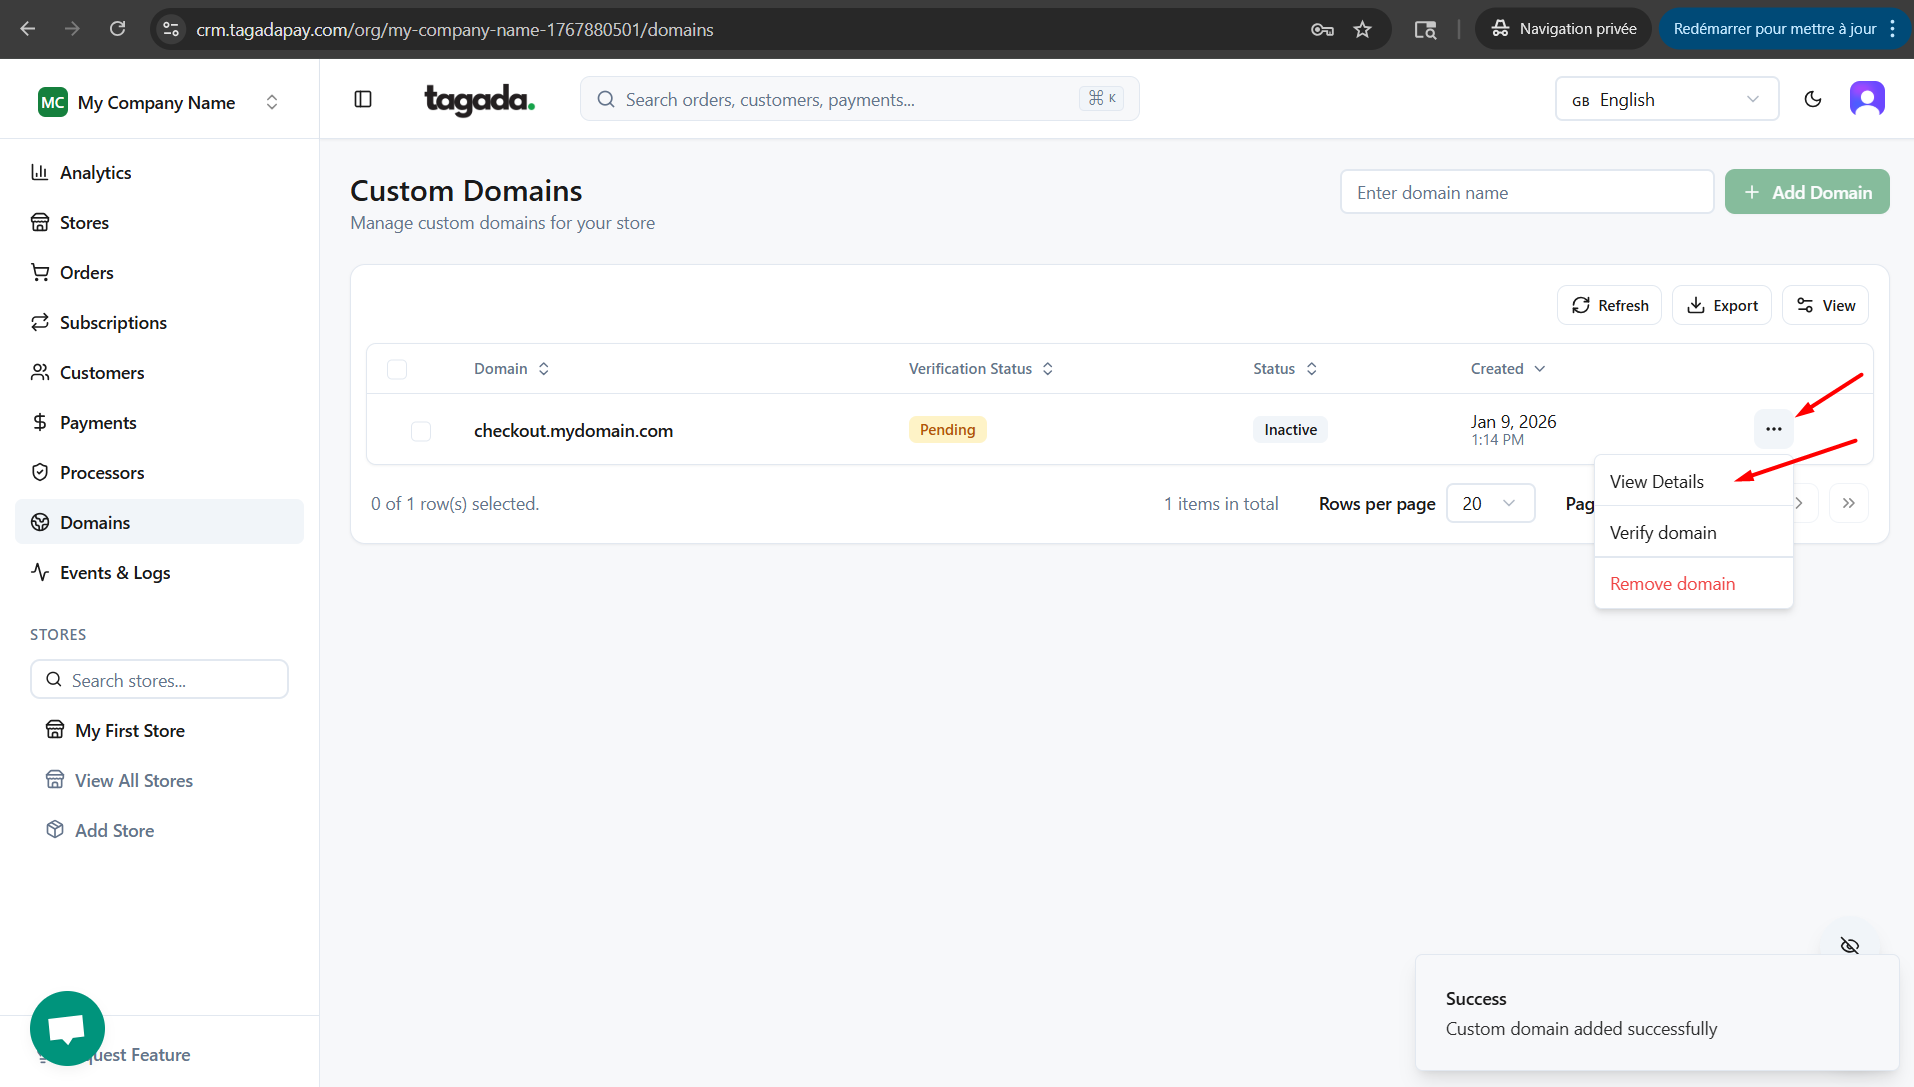
Click the three dots (…) next to your subdomain and select View Details.
This will show you the CNAME and TXT records to be added in the DNS settings of your domain host.
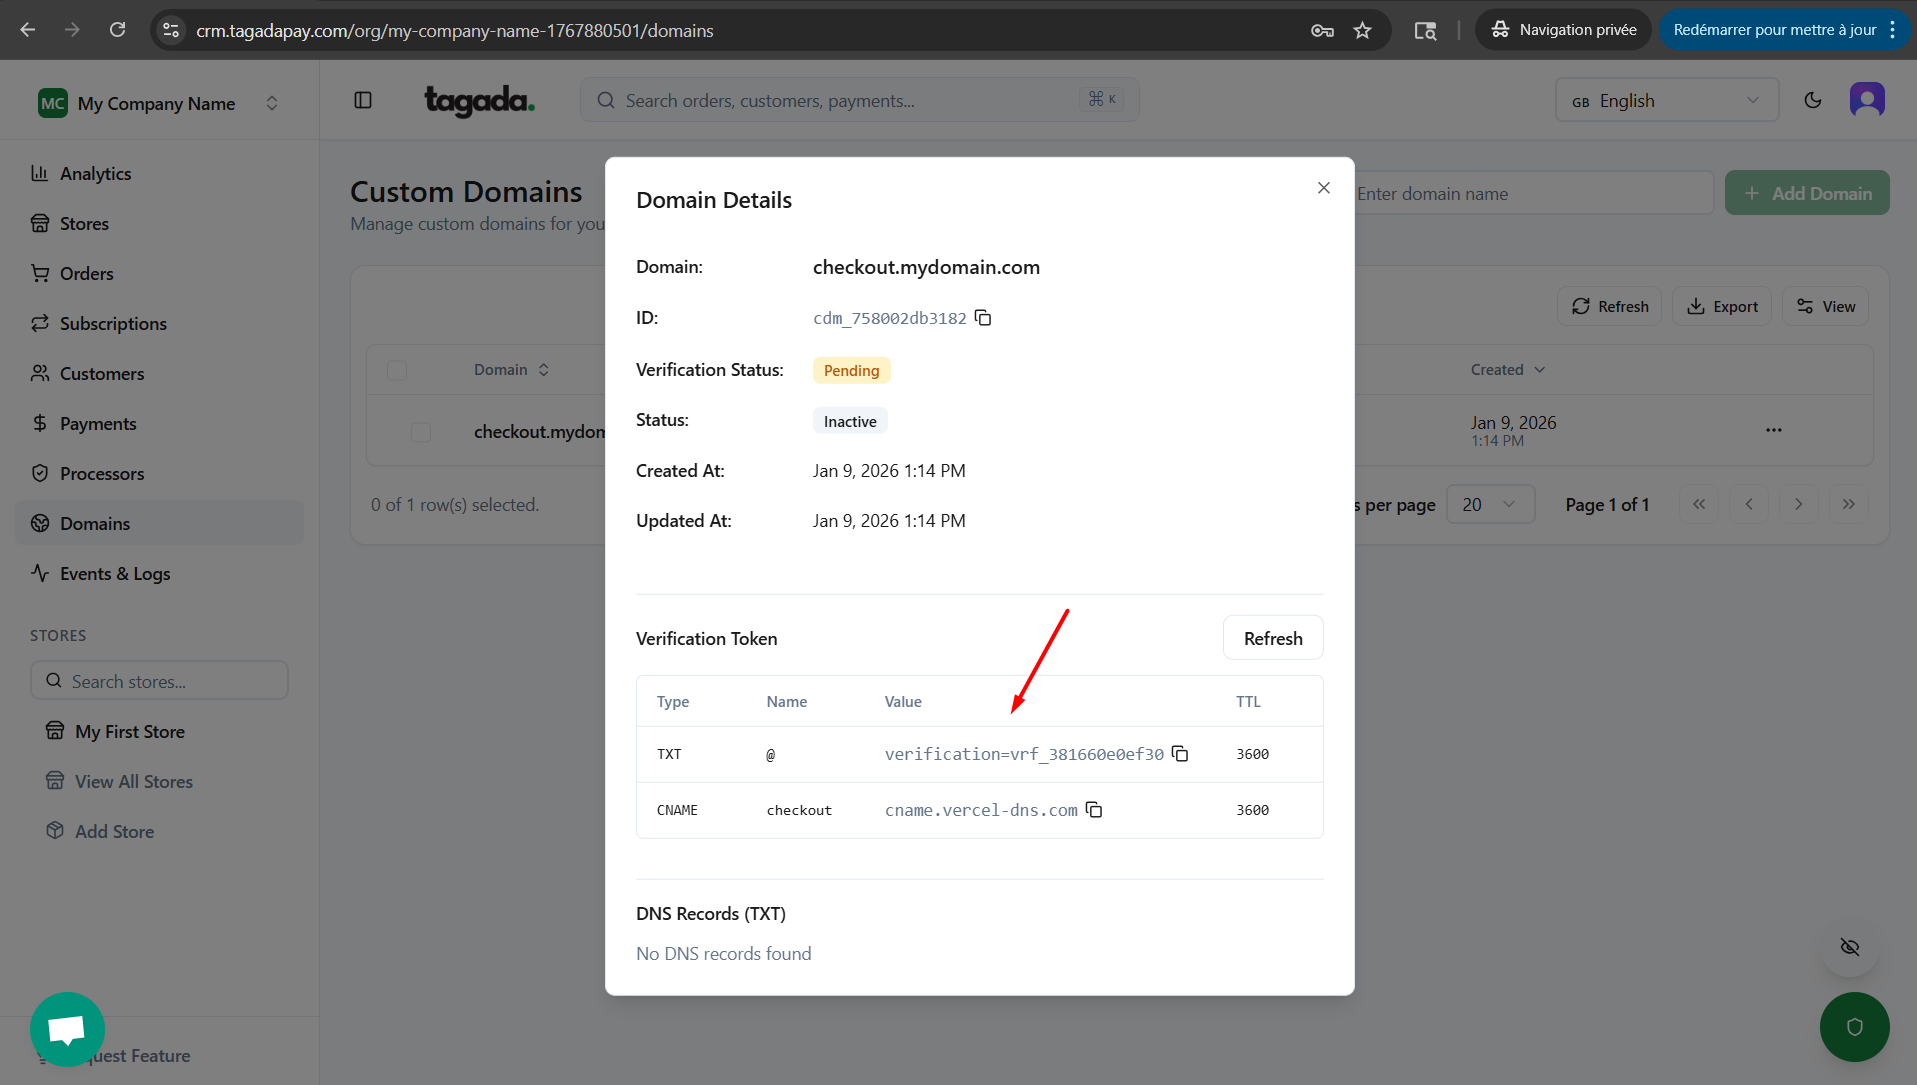
Note: If you're using a third-party domain provider, you can find detailed instructions on editing the DNS settings depending on which host you are using:
You can learn more about editing the DNS settings for your Shopify managed domain here.
You can learn more about editing the DNS settings for your Namecheap domain here.
You can learn more about editing the DNS settings for your Hostinger domain here.
Once you are done with editing the DNS settings with your domain provider, go back to Tagada Admin panel to check the status of your custom domain. If the status is still Pending, you can click on Verify Domain.
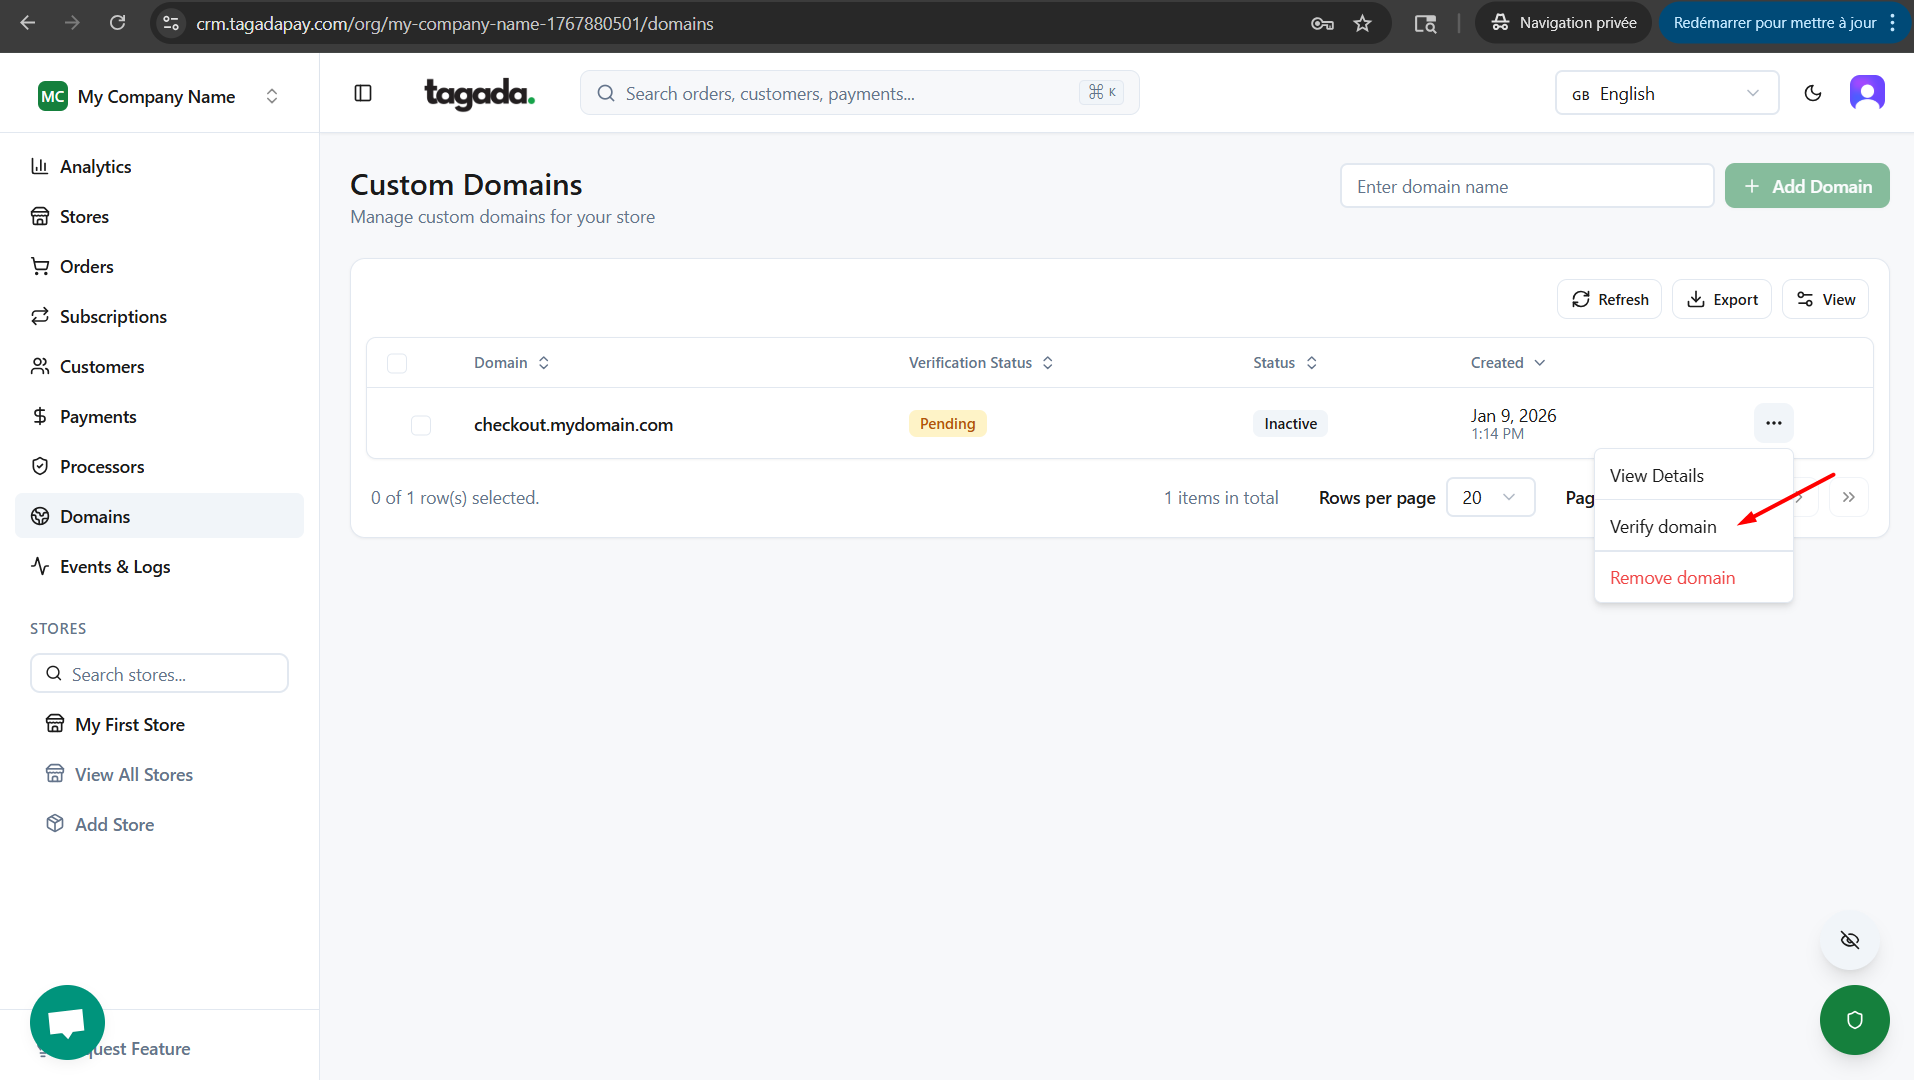
Once the status shows as Valid configuration, it means your checkout custom domain has been successfully configured and you are now able to publish your checkout.
Note: You can only add a subdomain by choosing a custom prefix (for example, checkout.yourdomain.com).
If this subdomain is already in use by another service, you won’t be able to use it again. In that case, adding a new CNAME record will not be allowed.
