These are the steps that you have to take to connect Klaviyo to Tagada.
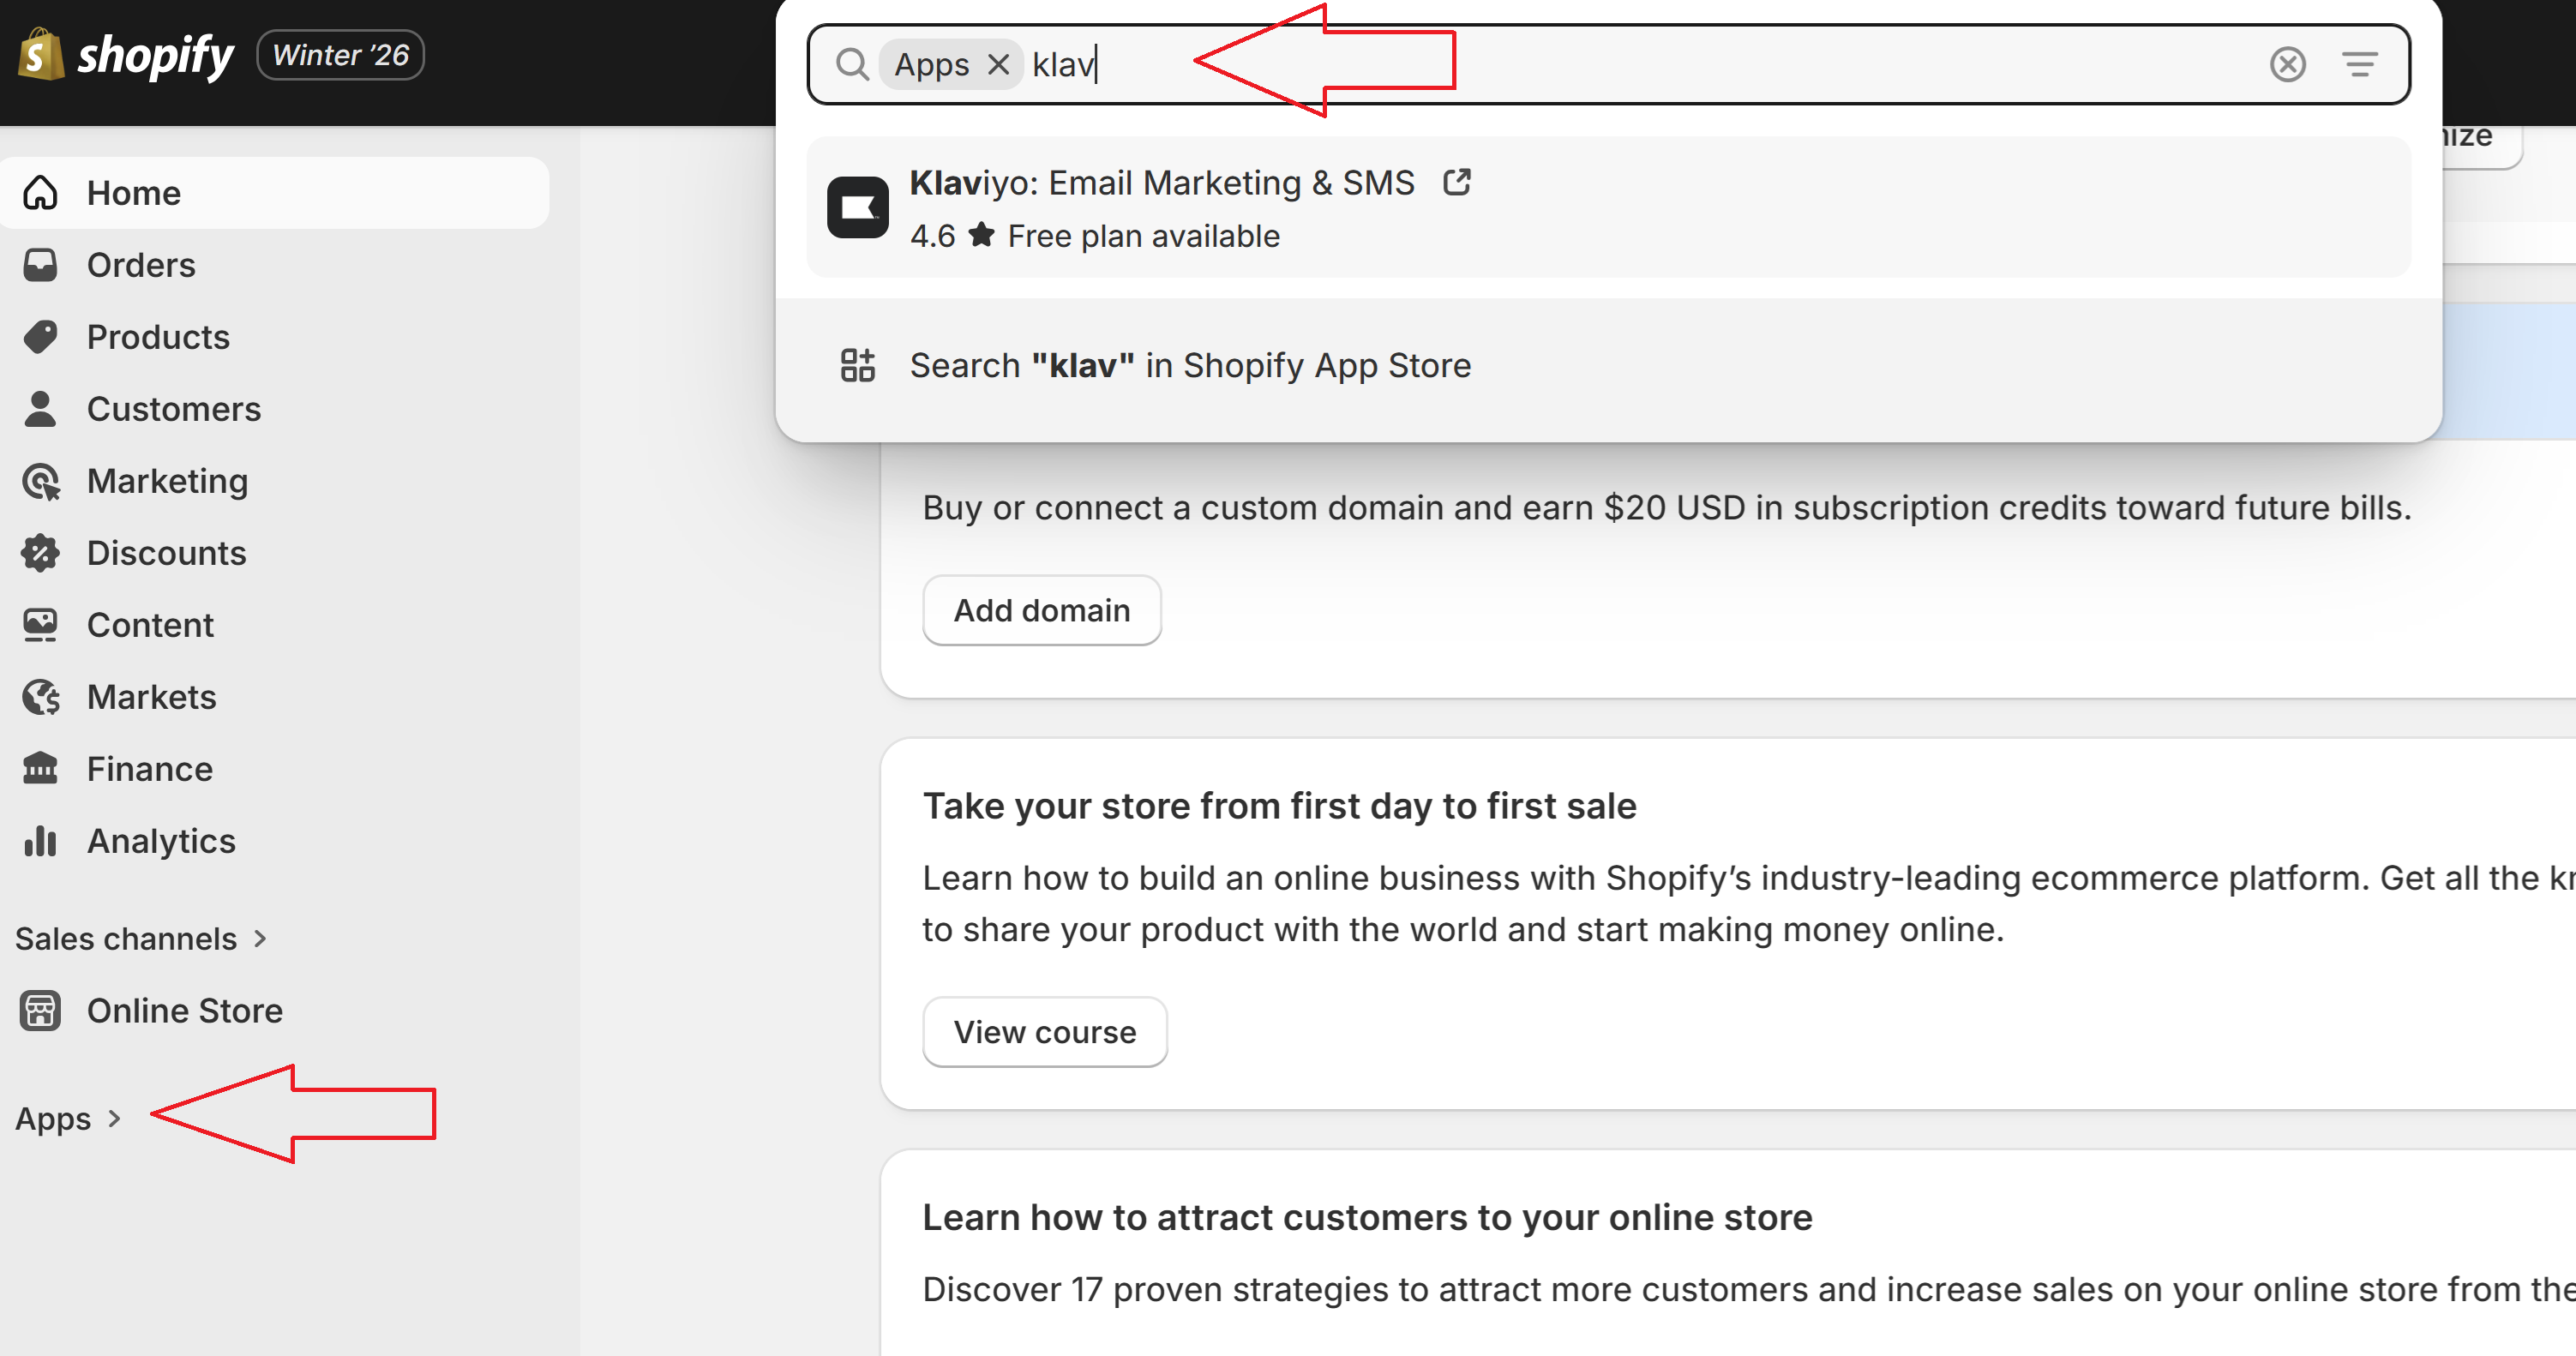
1. Open Shopify, go to Apps and find Klaviyo
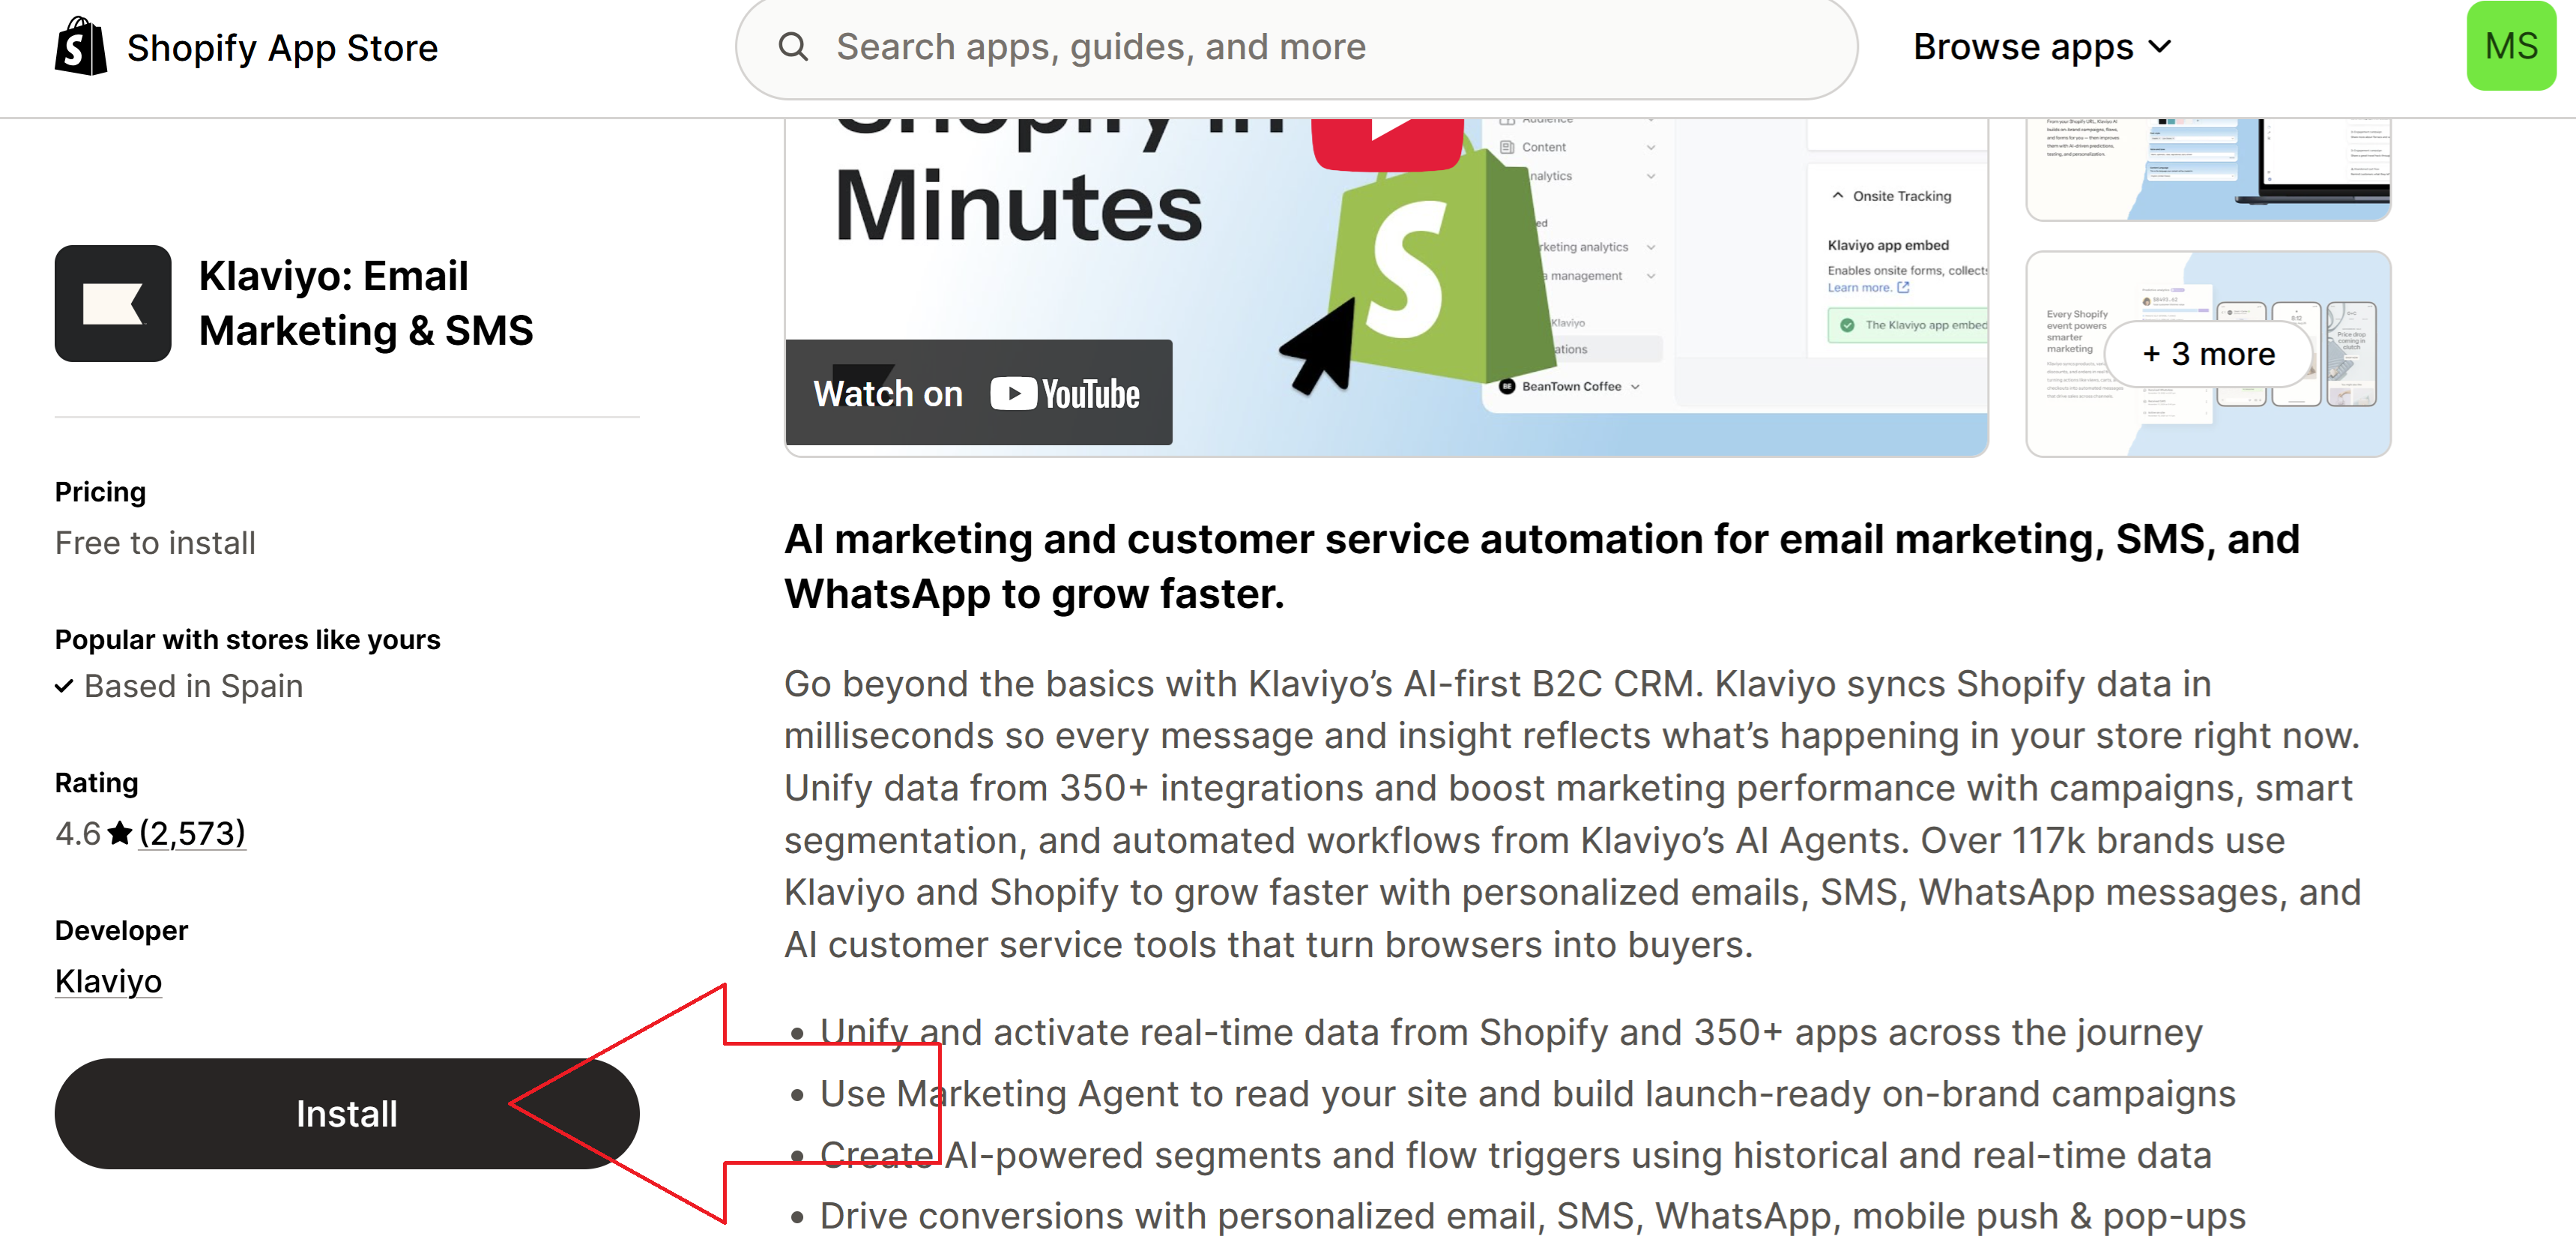
2. Then you Install it
IMPORTANT - If it’s your first time setting up Klaviyo, you will have to open an account with them and then to set up all the individual email and sms sequences that you want to use i.e. - abandonded checkout email sequence, sms blast etc.

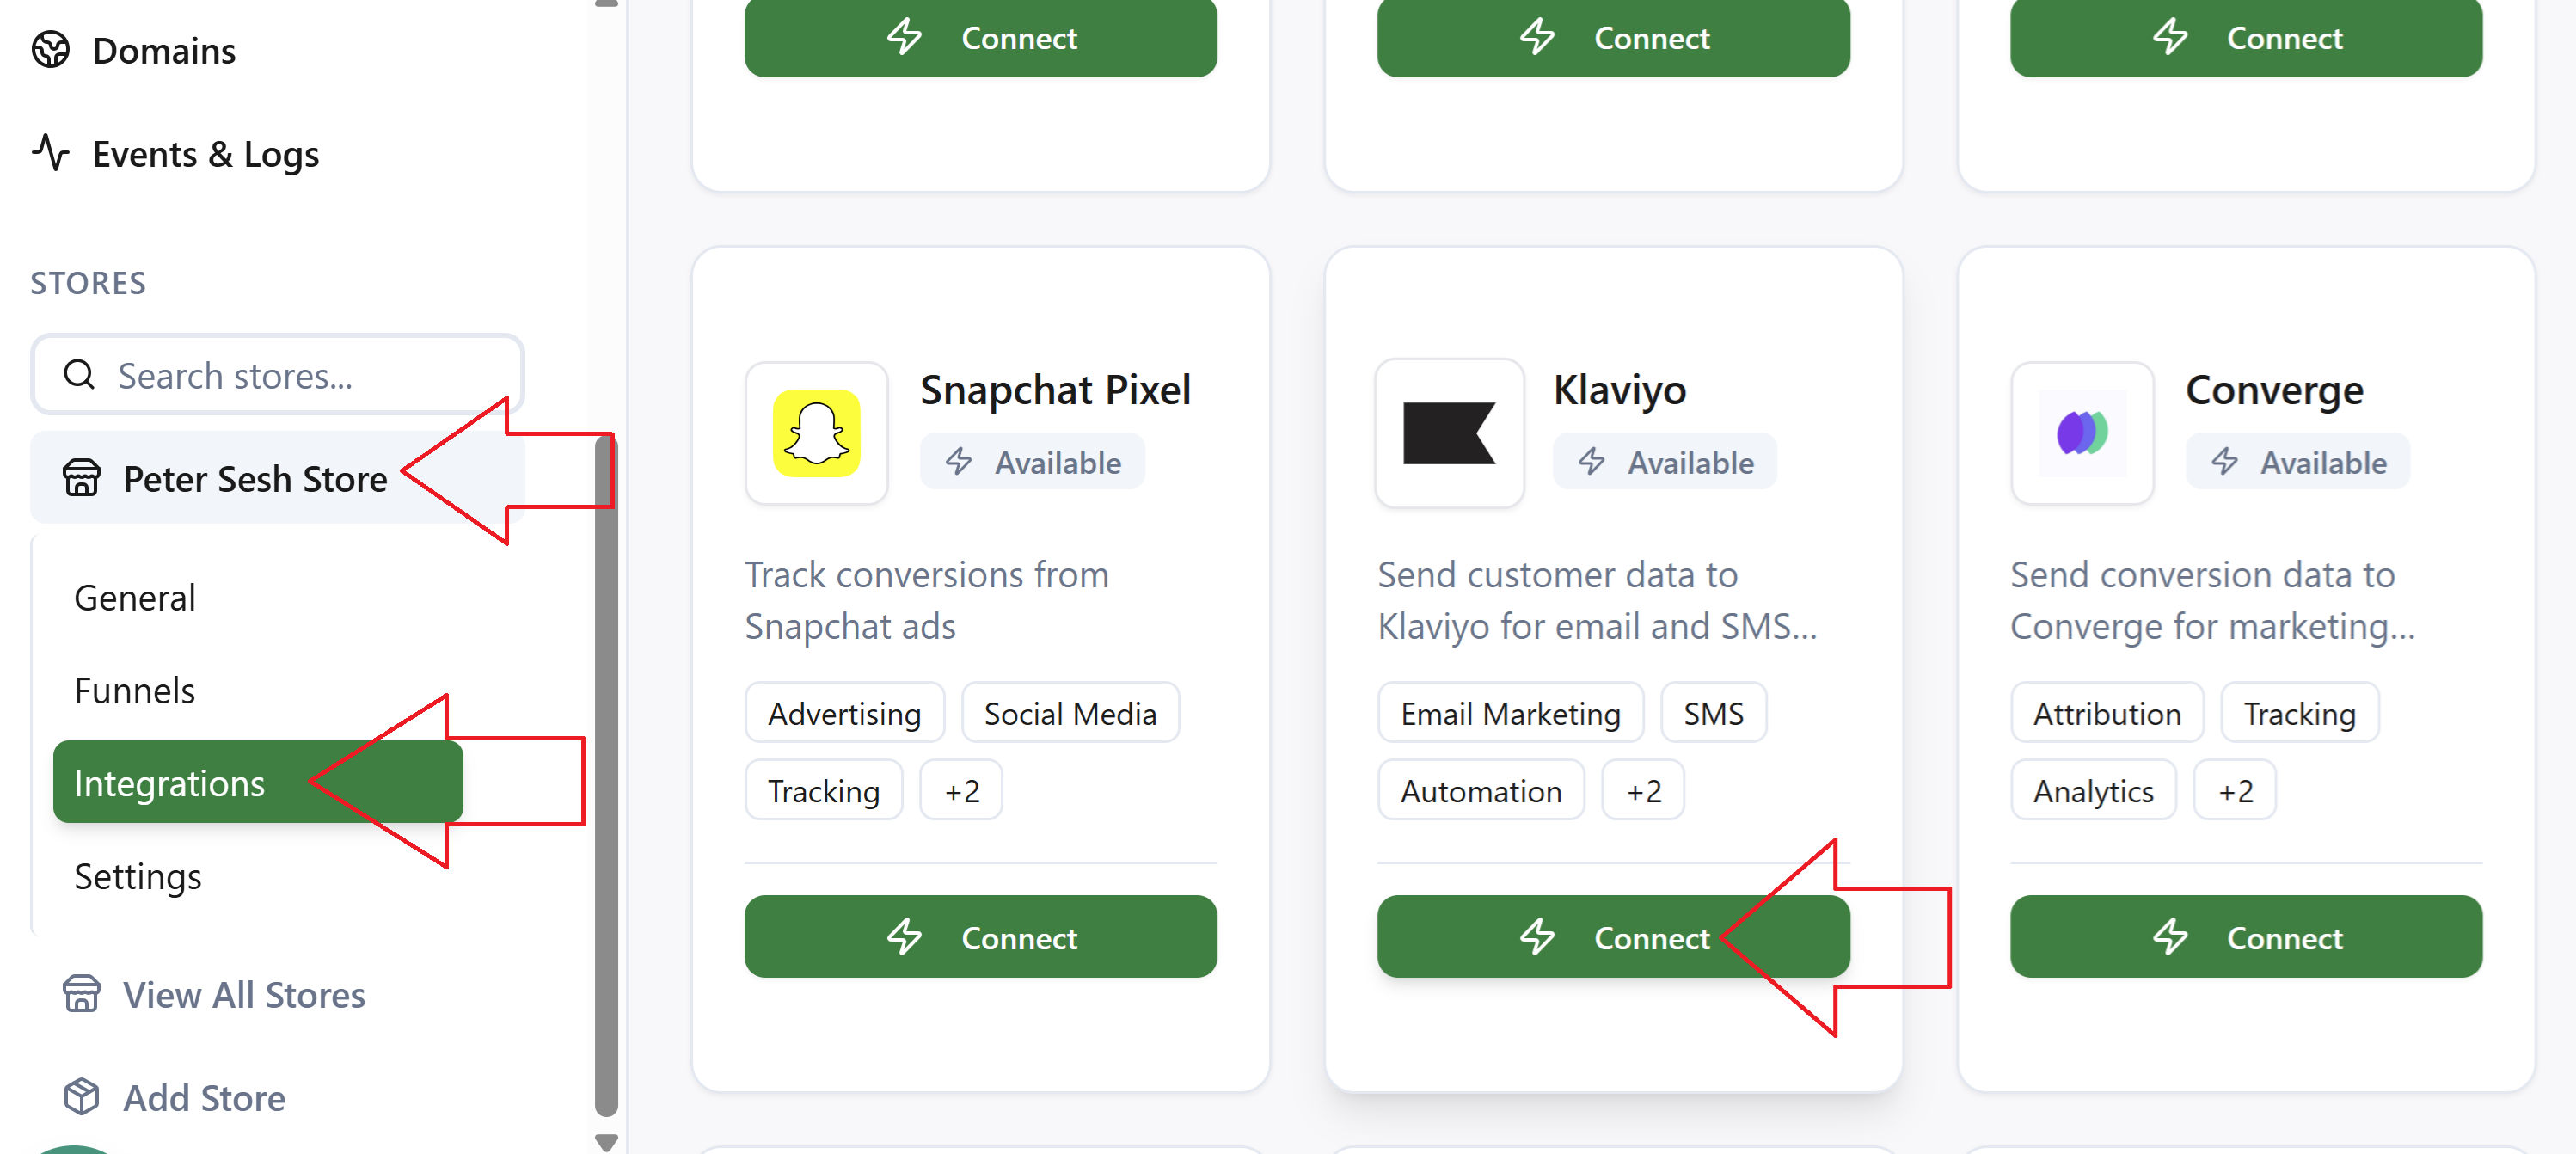
Then you go to the Tagada Platform, click on your store and go to integrations, find Klaviyo and click on Connect
Then you have to find your API keys. Go back to your Klaviyo account, click on your store, then settings

Then you go to - Account - API Keys - Create Private API Key

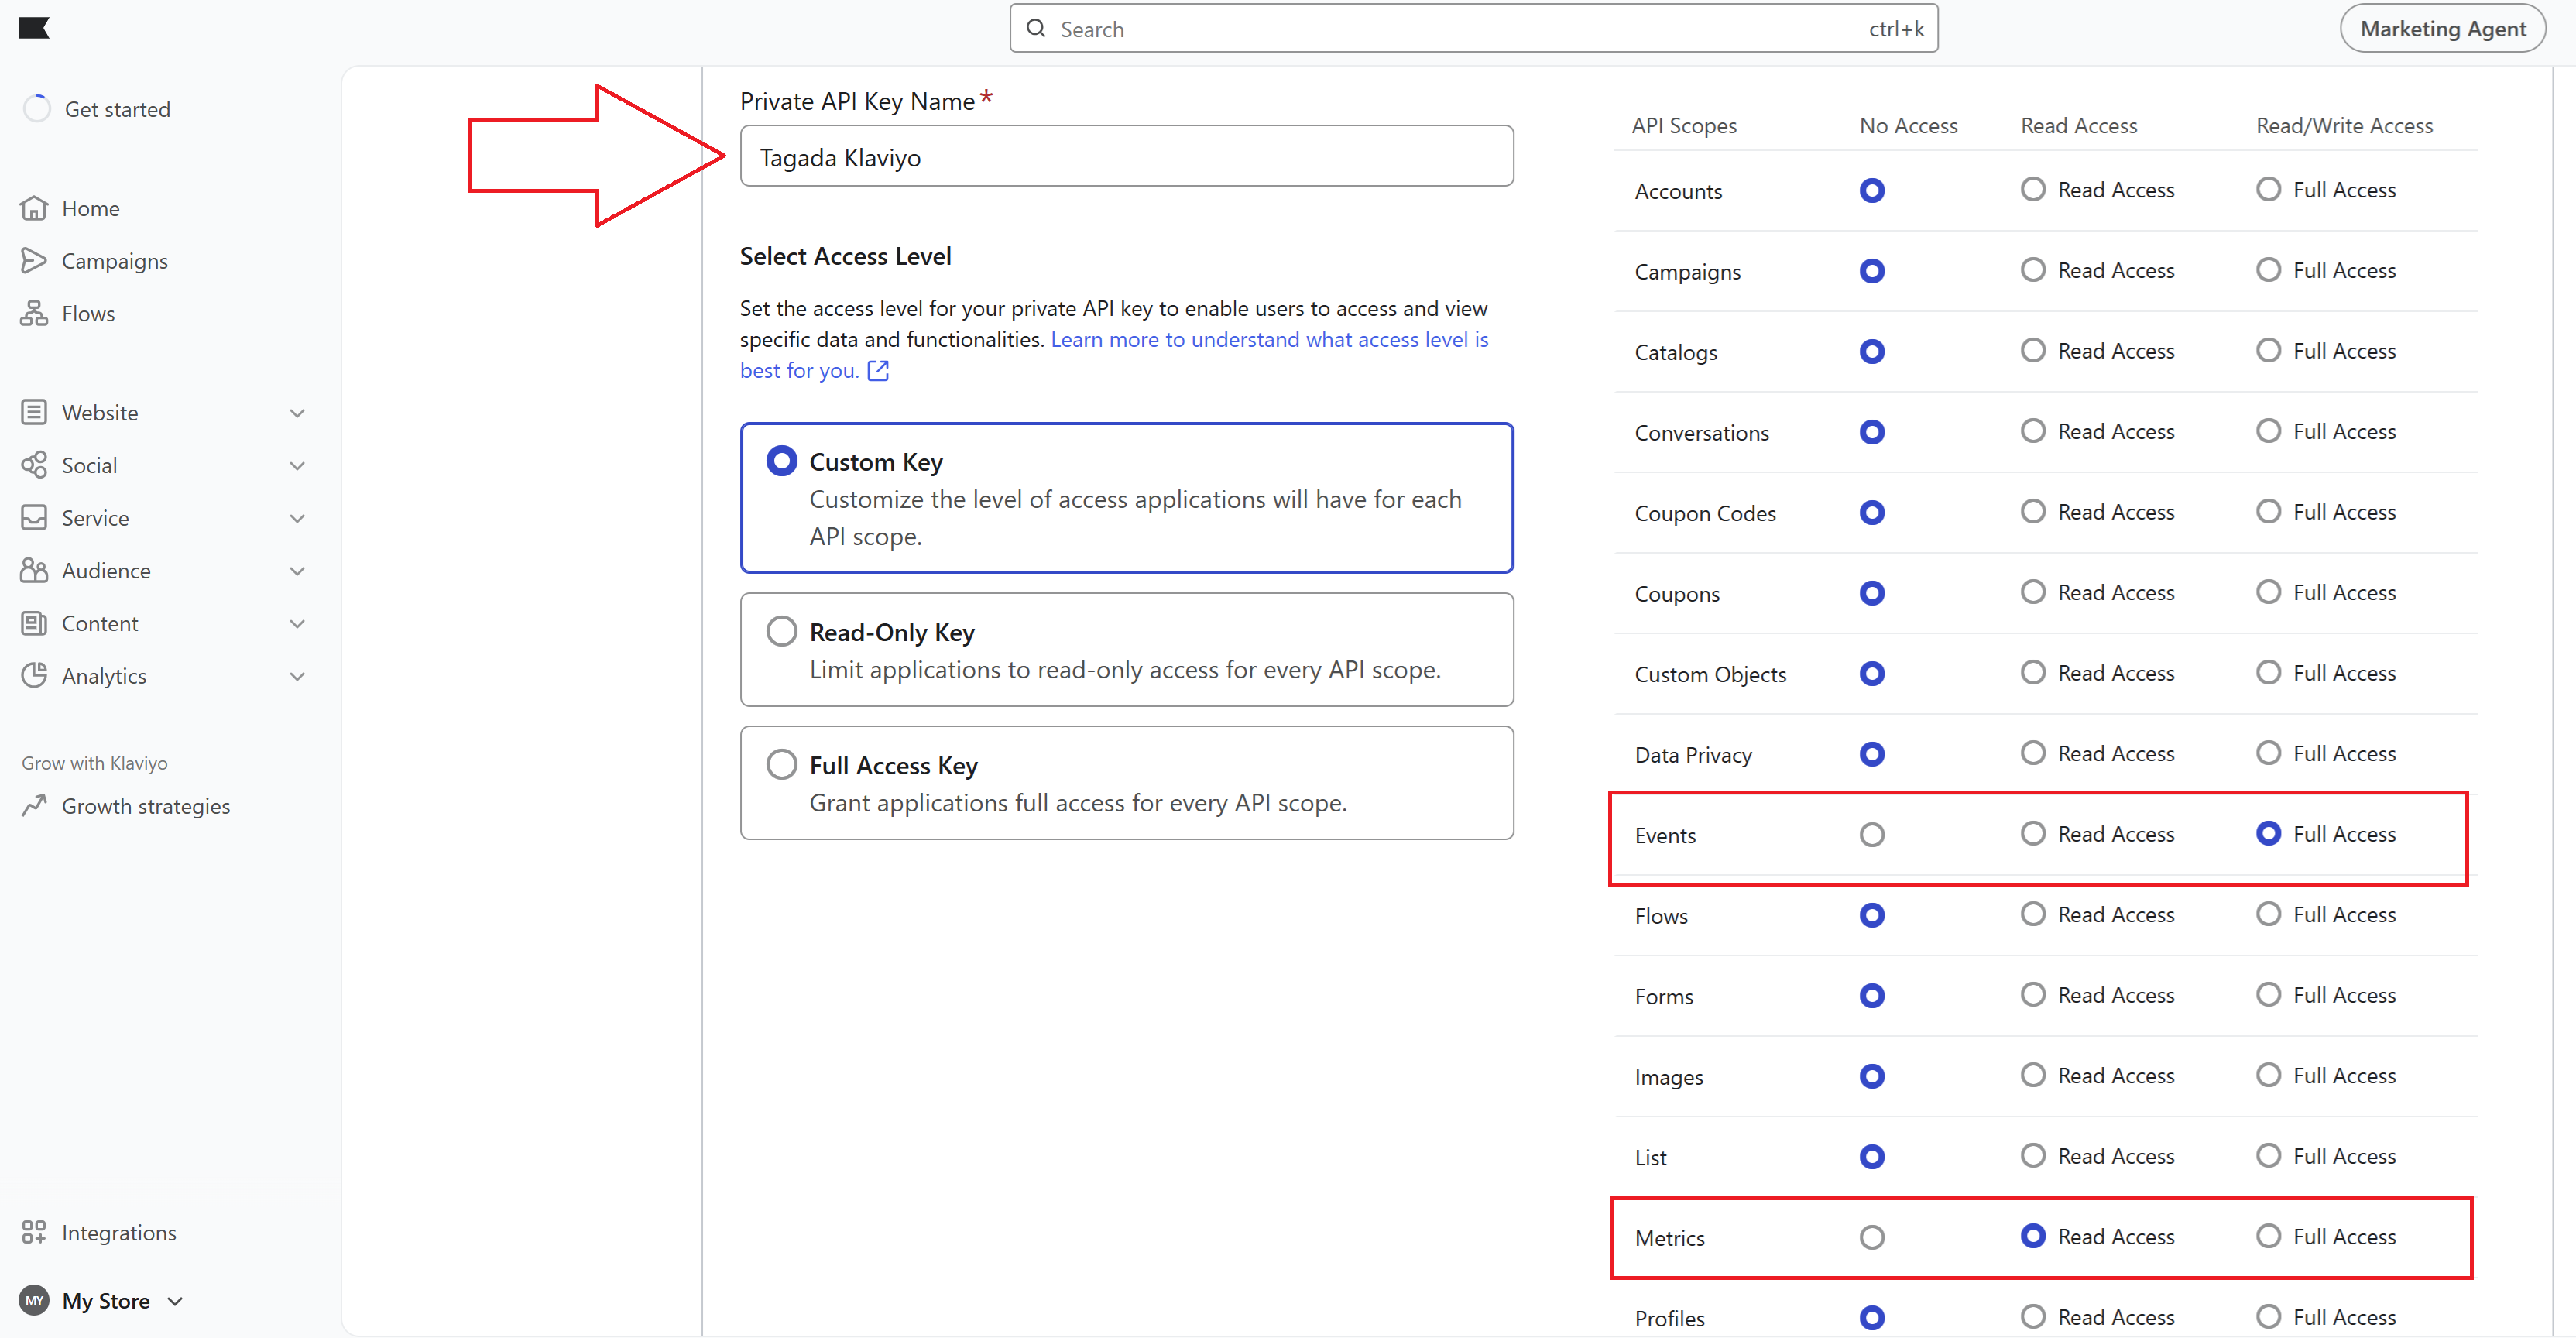
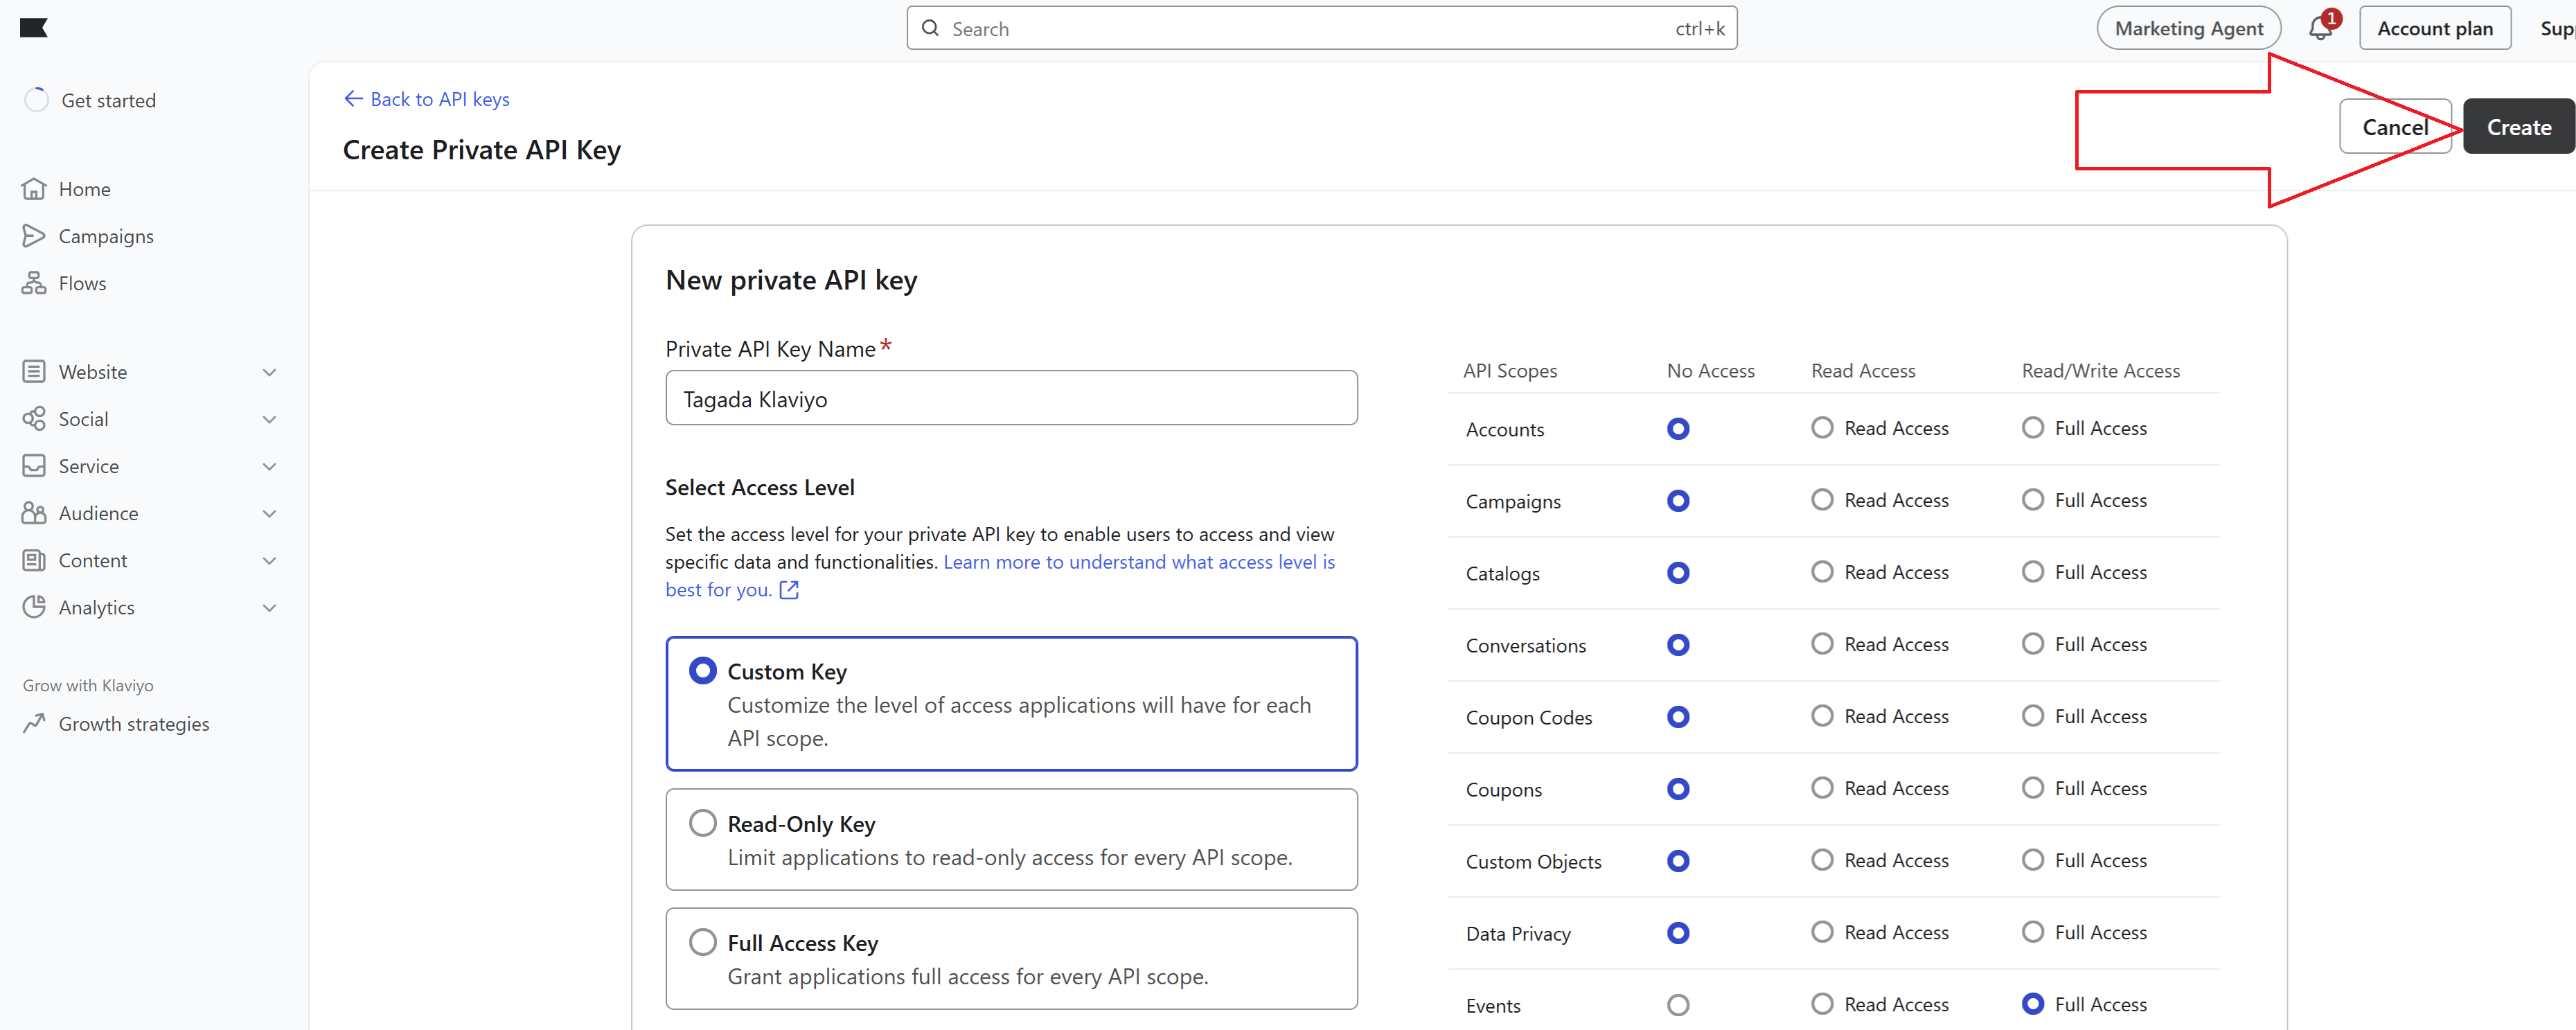
Name your private key as you wish, for example Tagada Klaviyo. Then you select Custom Key. Then on the right hand side you will see all the permissions. You have to select only two:
1. Events - Full Access (Read/Write)
2. Metrics - Read Access
Then you click on Create
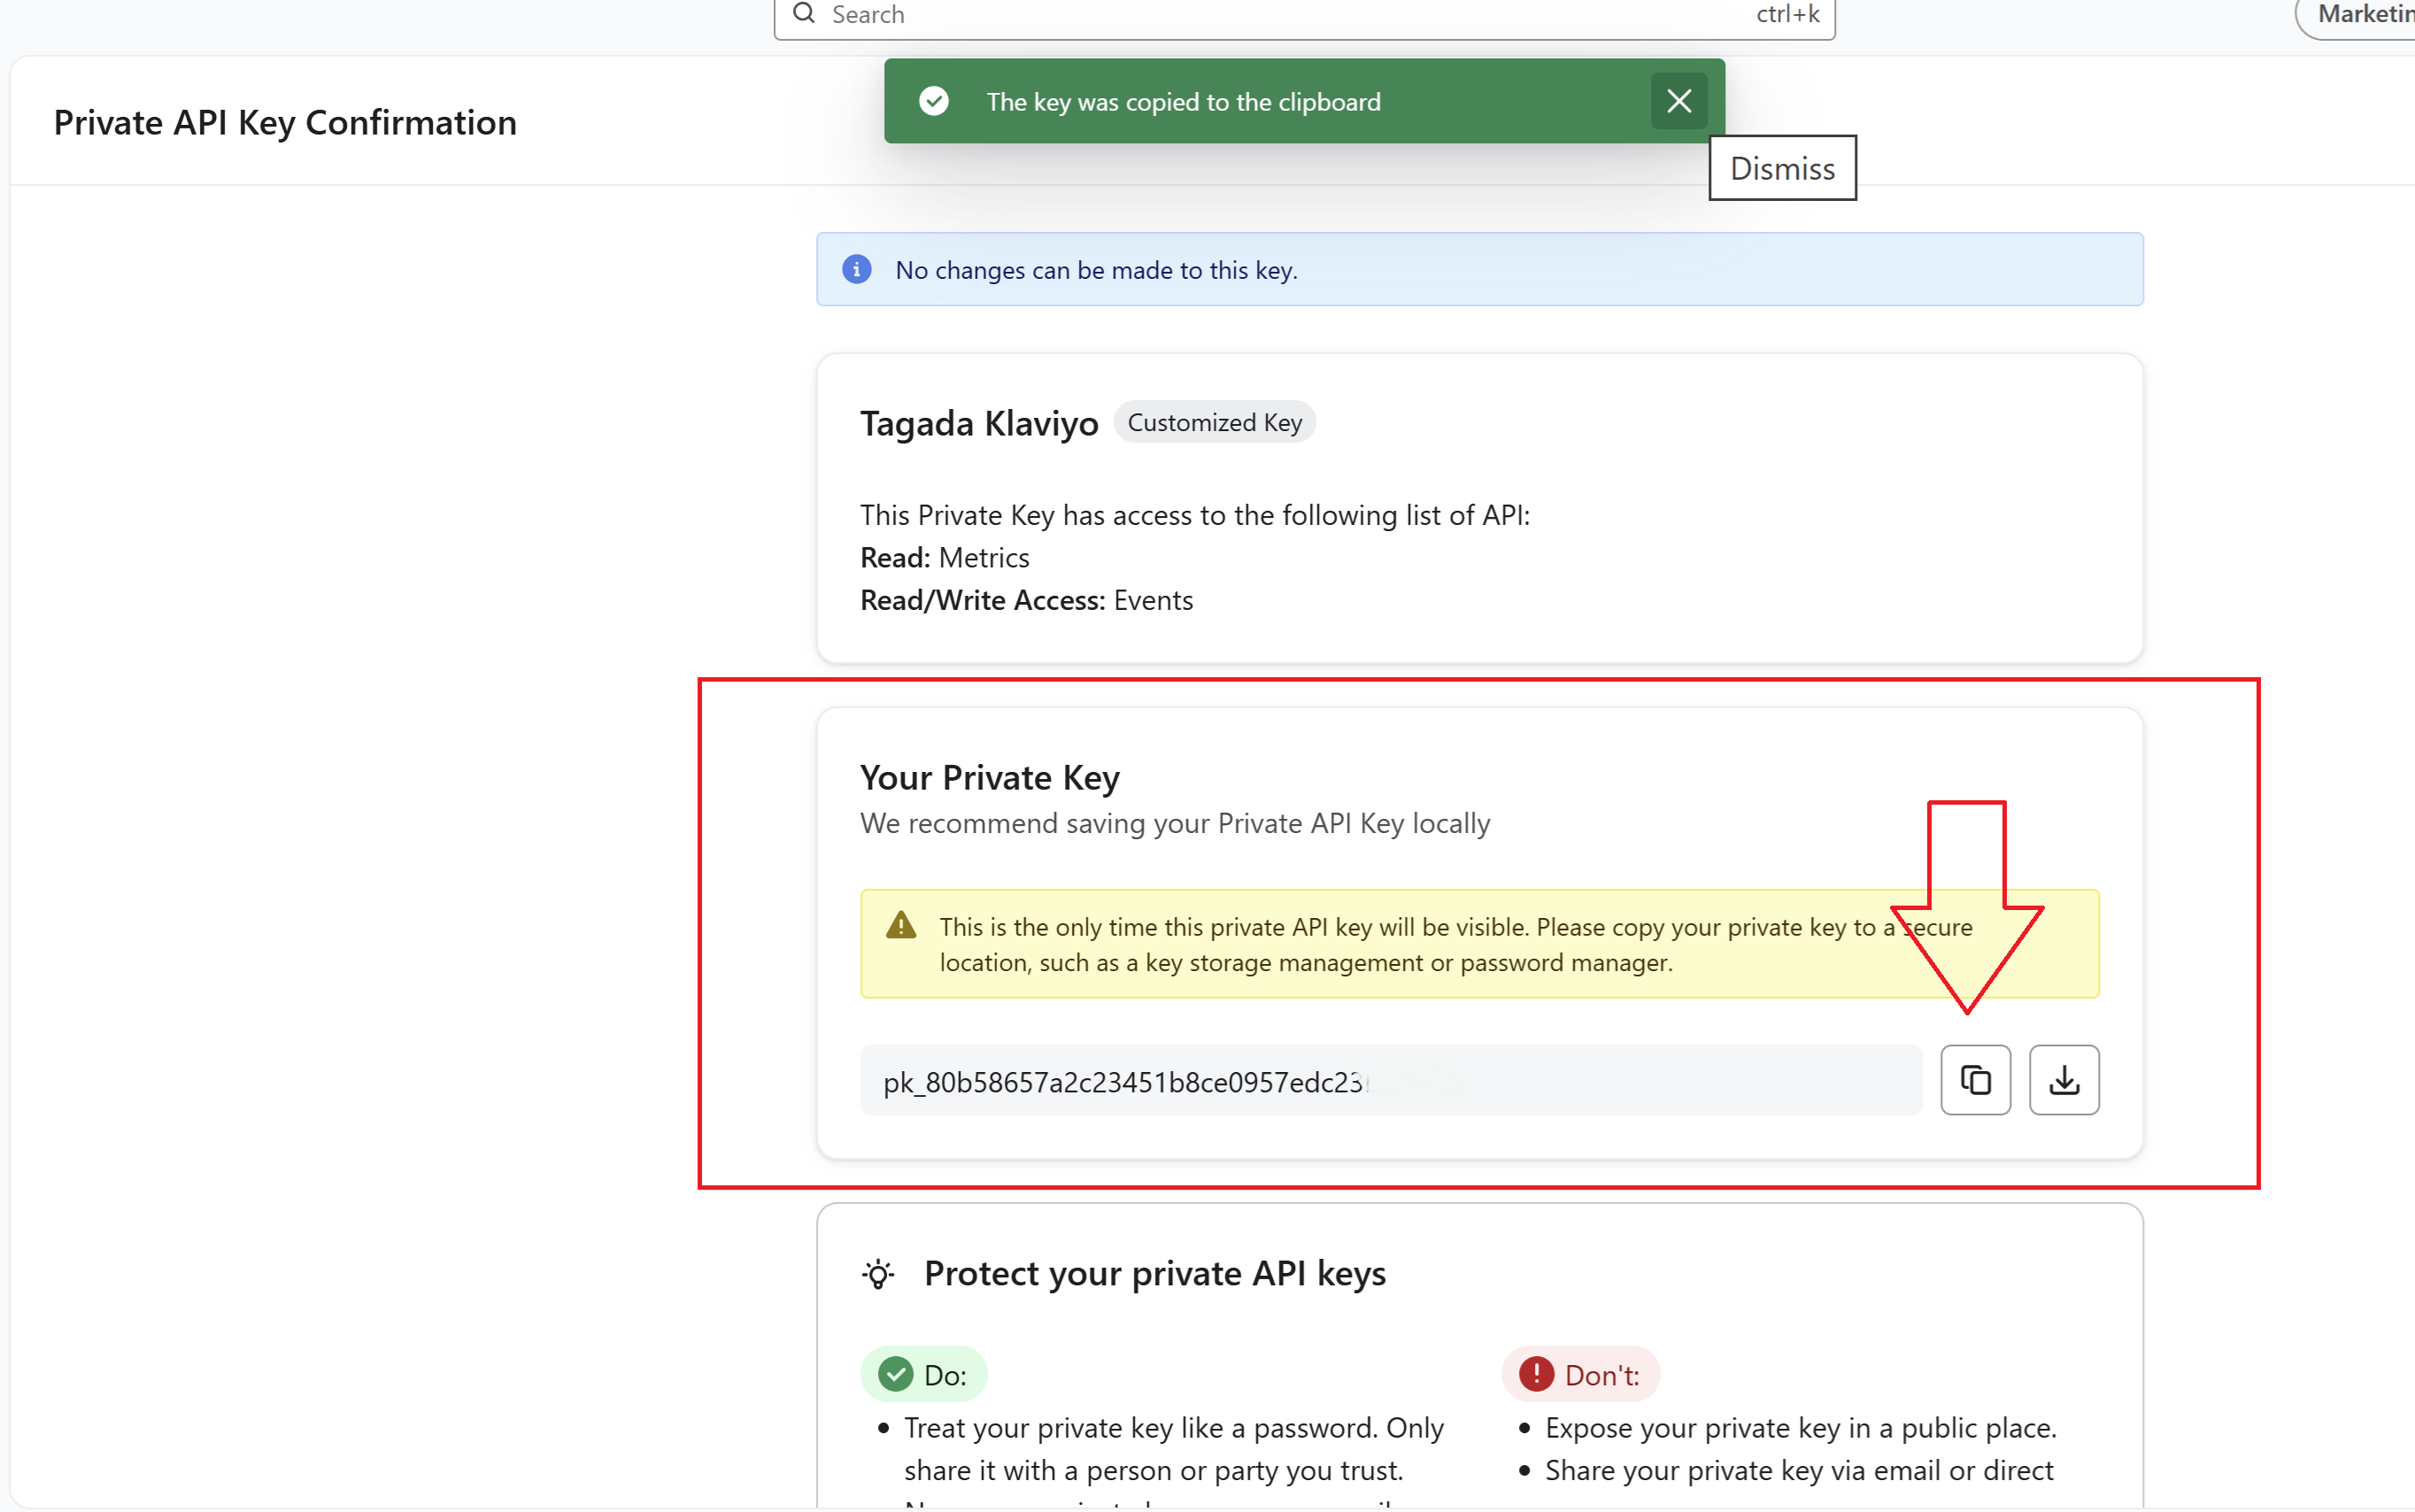
Then you copy your private key and go back to the Tagada platform
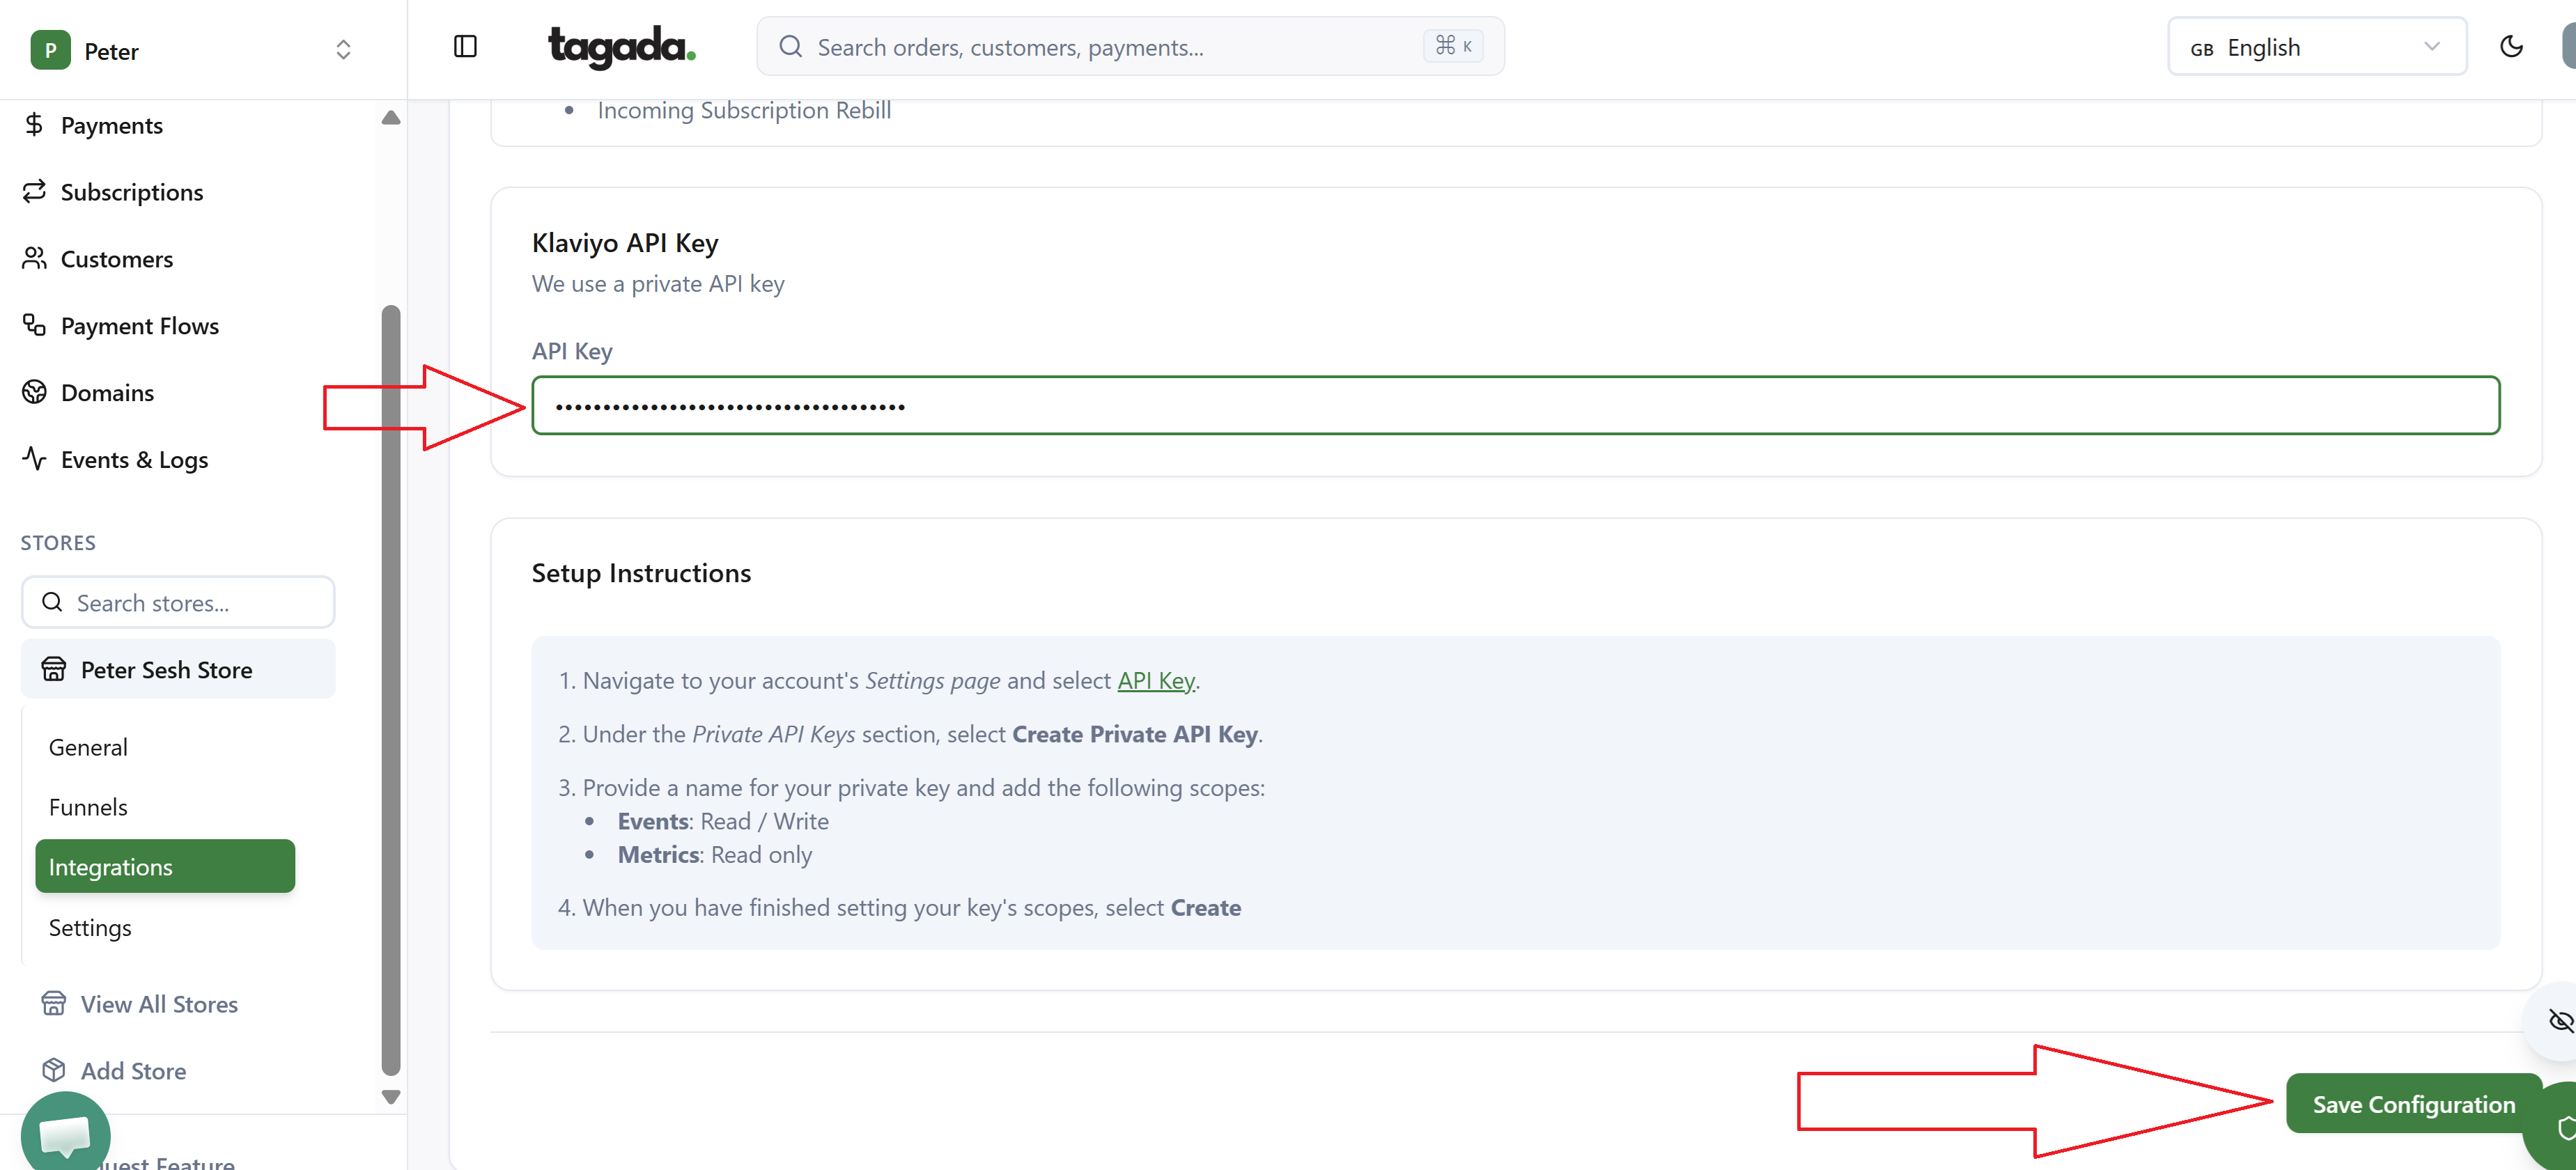
In Integrations - Klaviyo - API key, you paste your private key and press Save Configuration
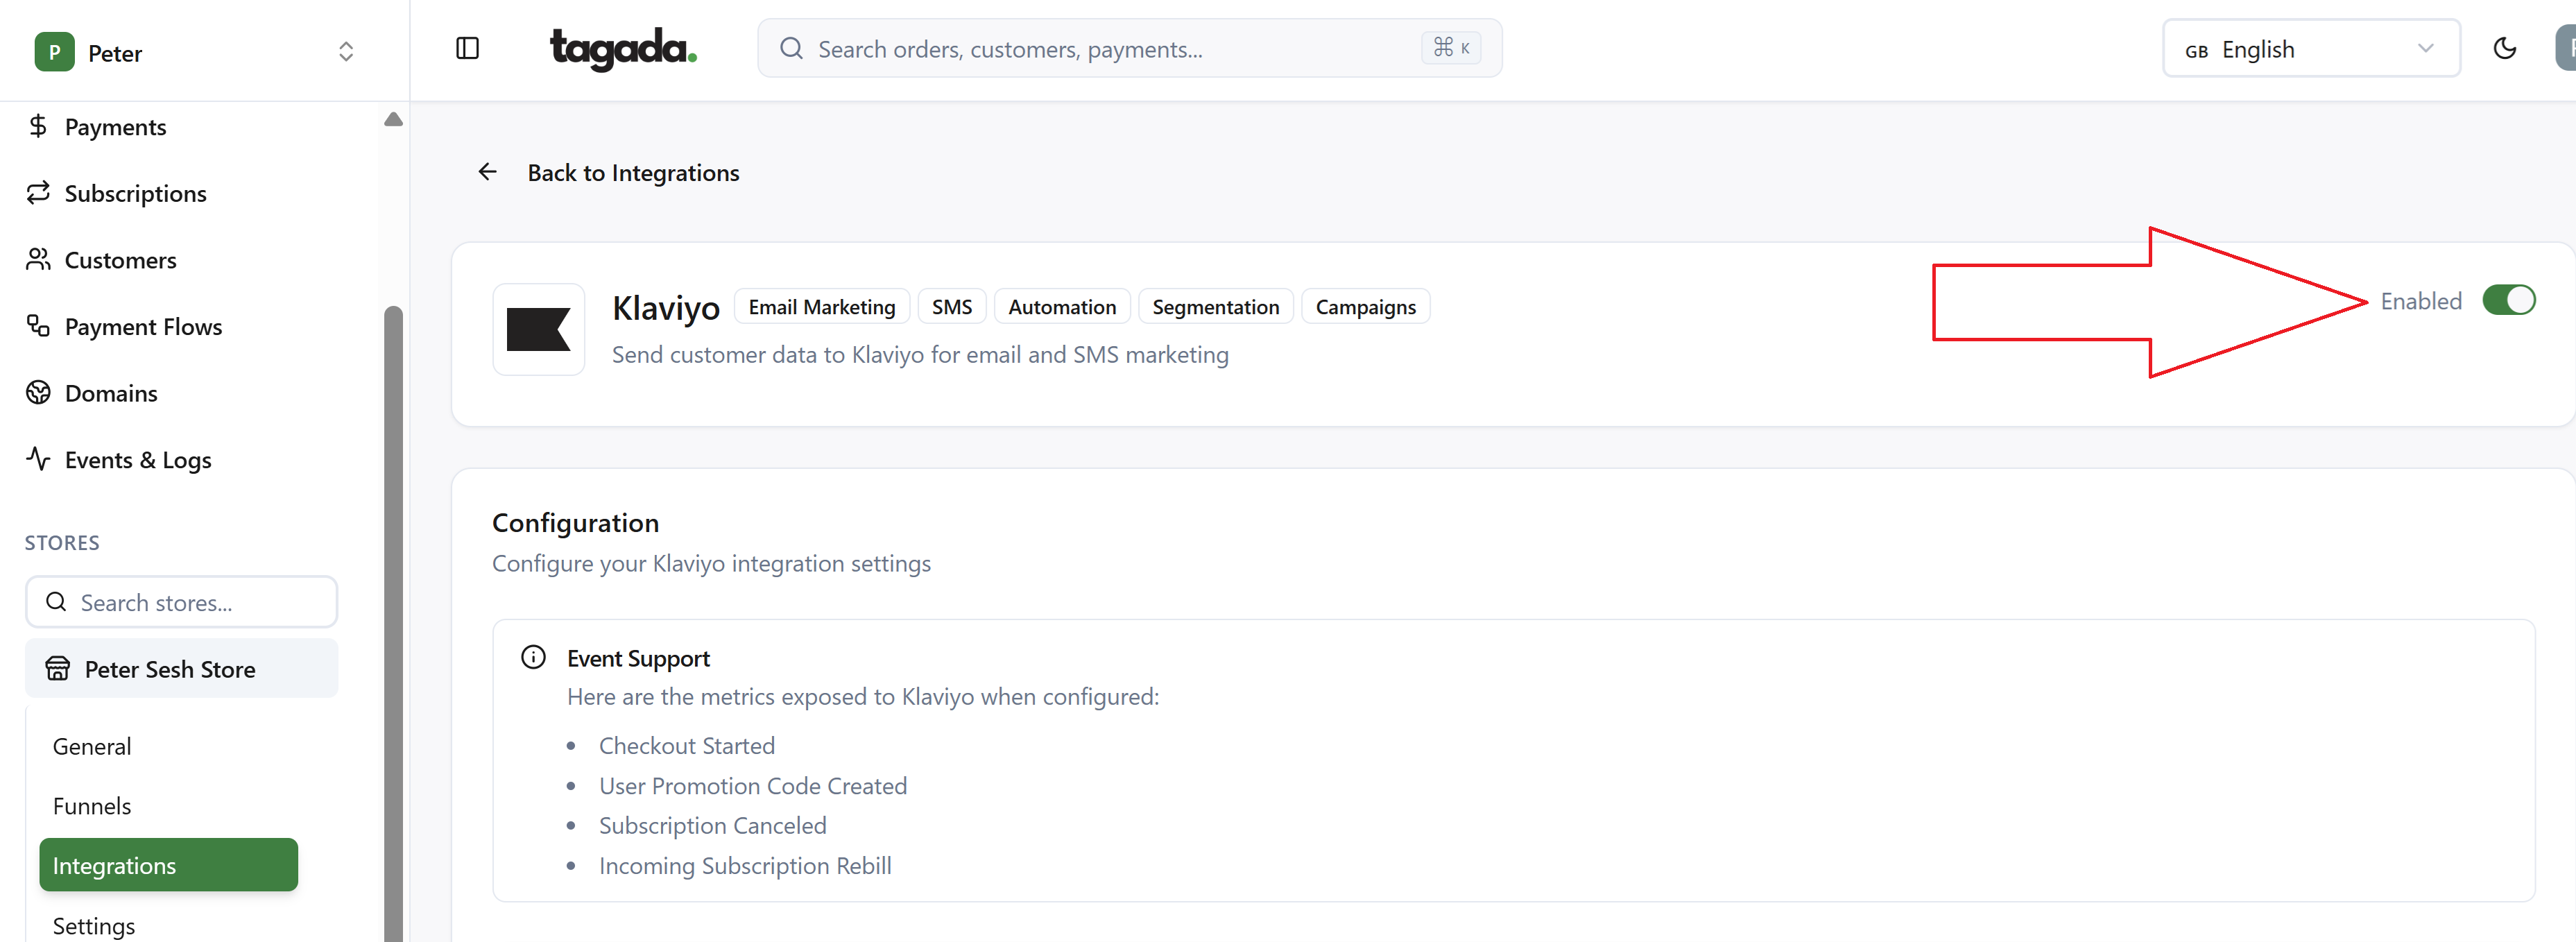
Make sure on the top right corner your Klaviyo integration is Enabled. Otherwise, it won’t work.
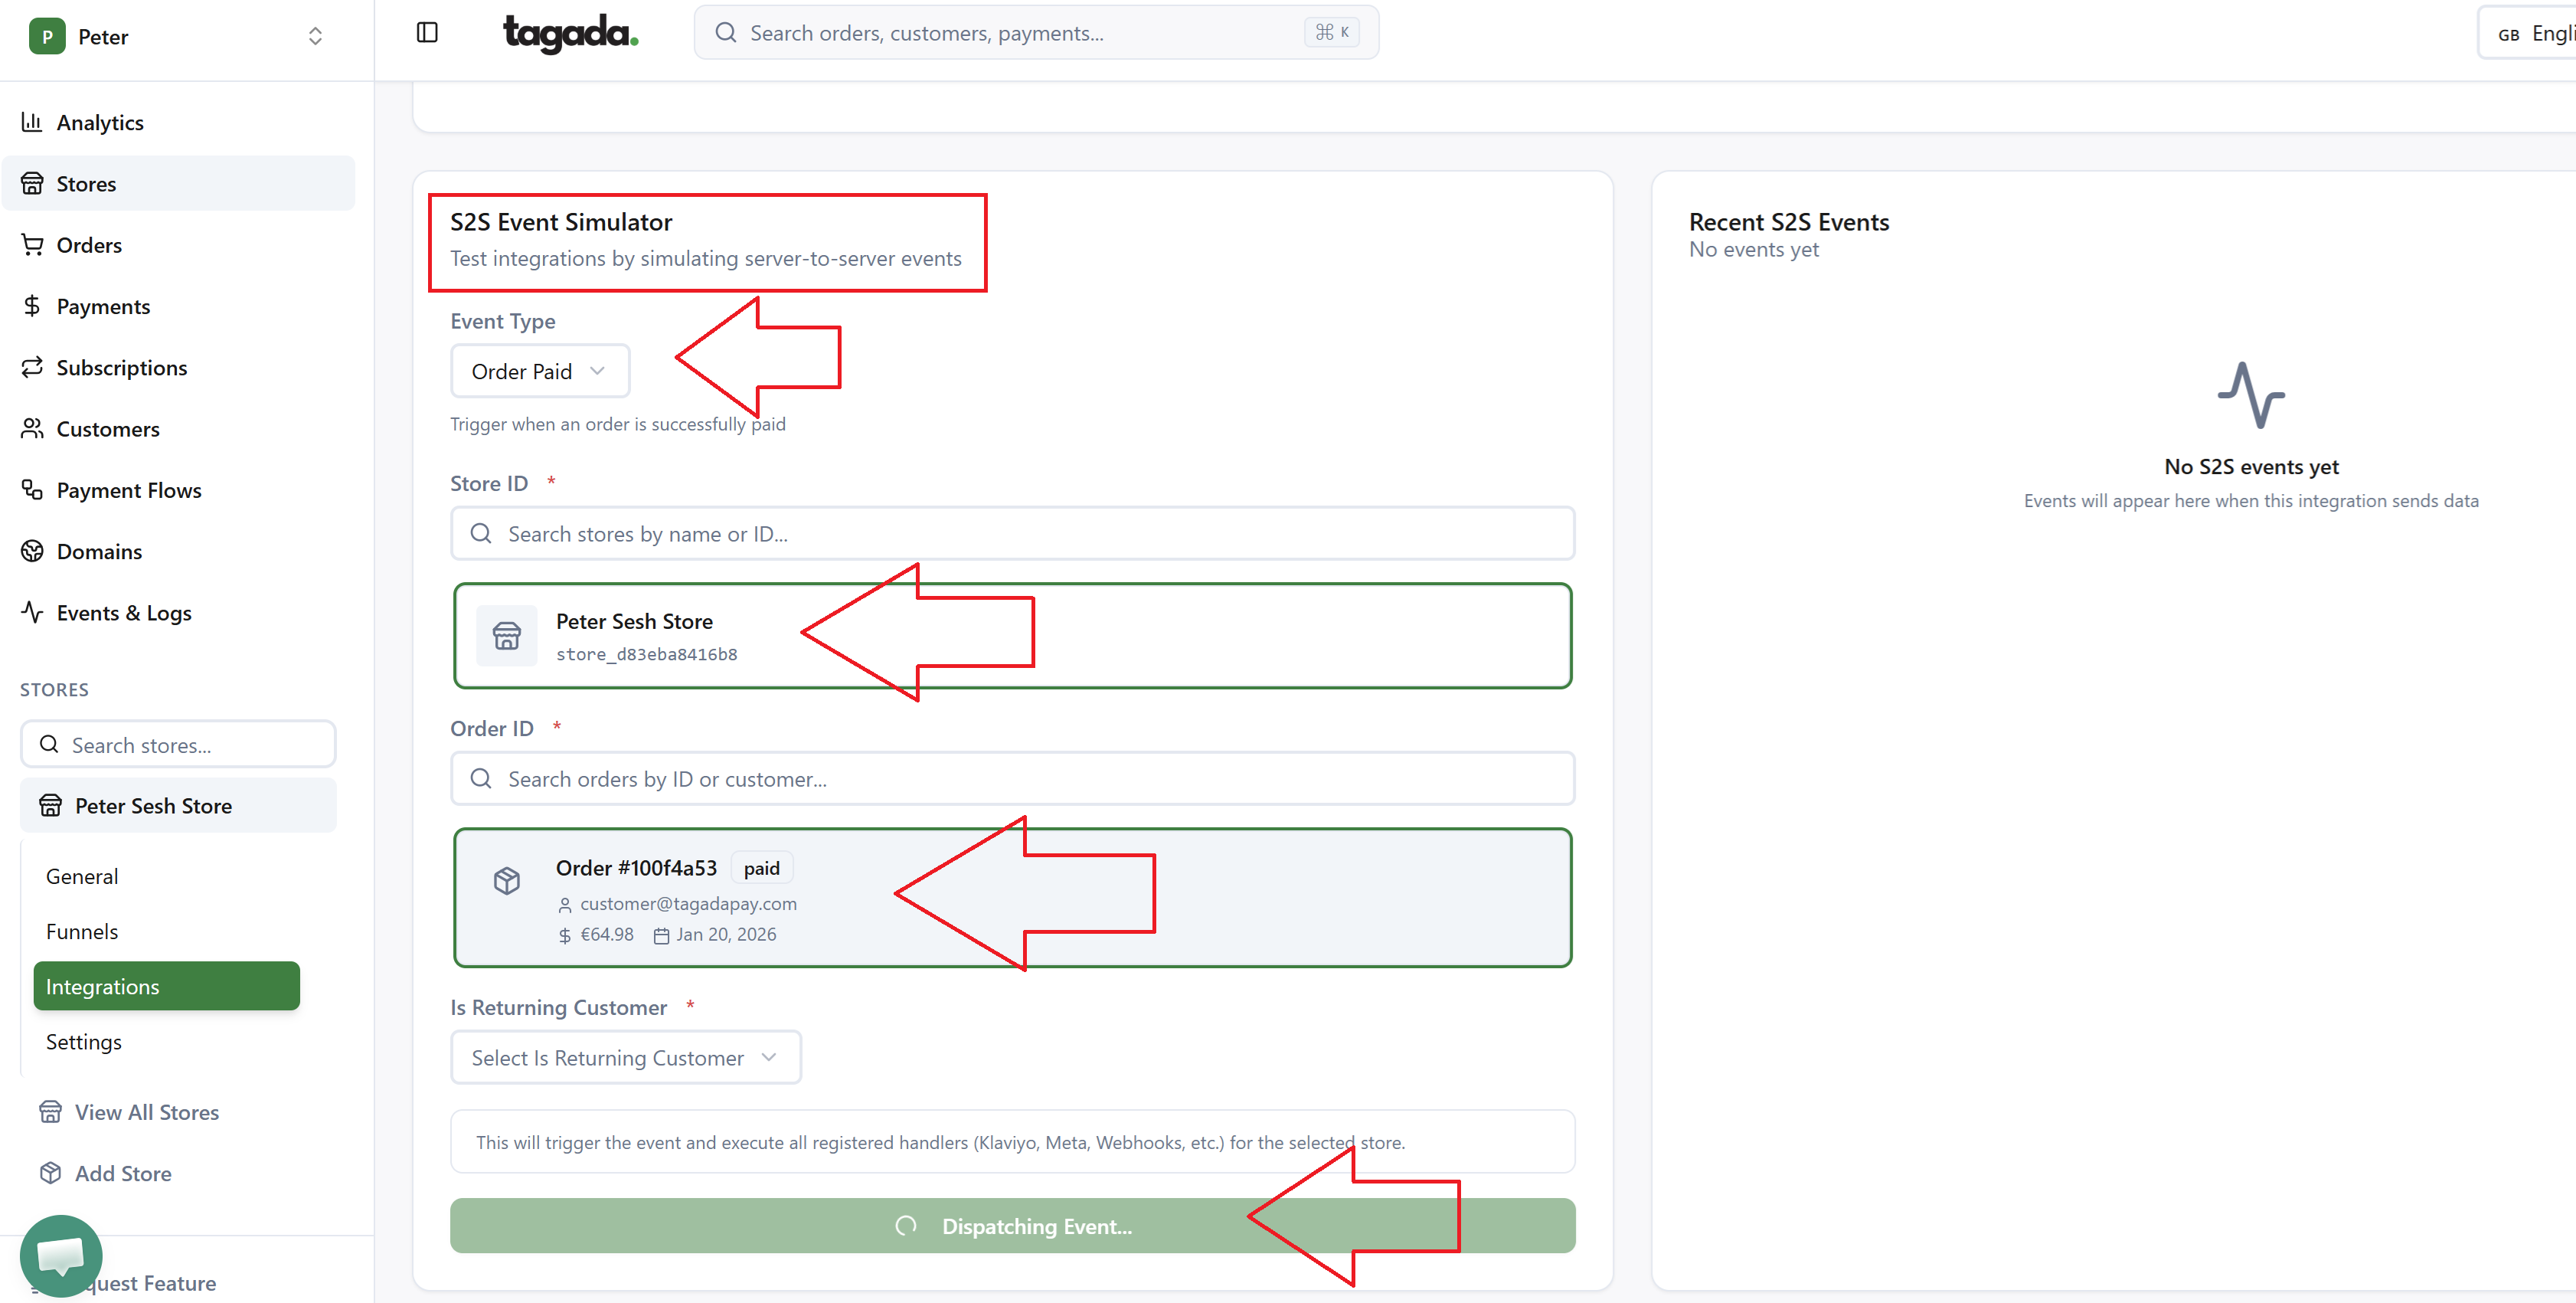
Then you have to test the connection. If you scroll to the bottom you will see the test event simulator. You select your event type, then your store and the example order that you have and press Dispatch event to send the test event and officially connect it.
P.S. - We are in the process of updating the event types so we have the full selection that is available on Klaviyo too. Thanks