
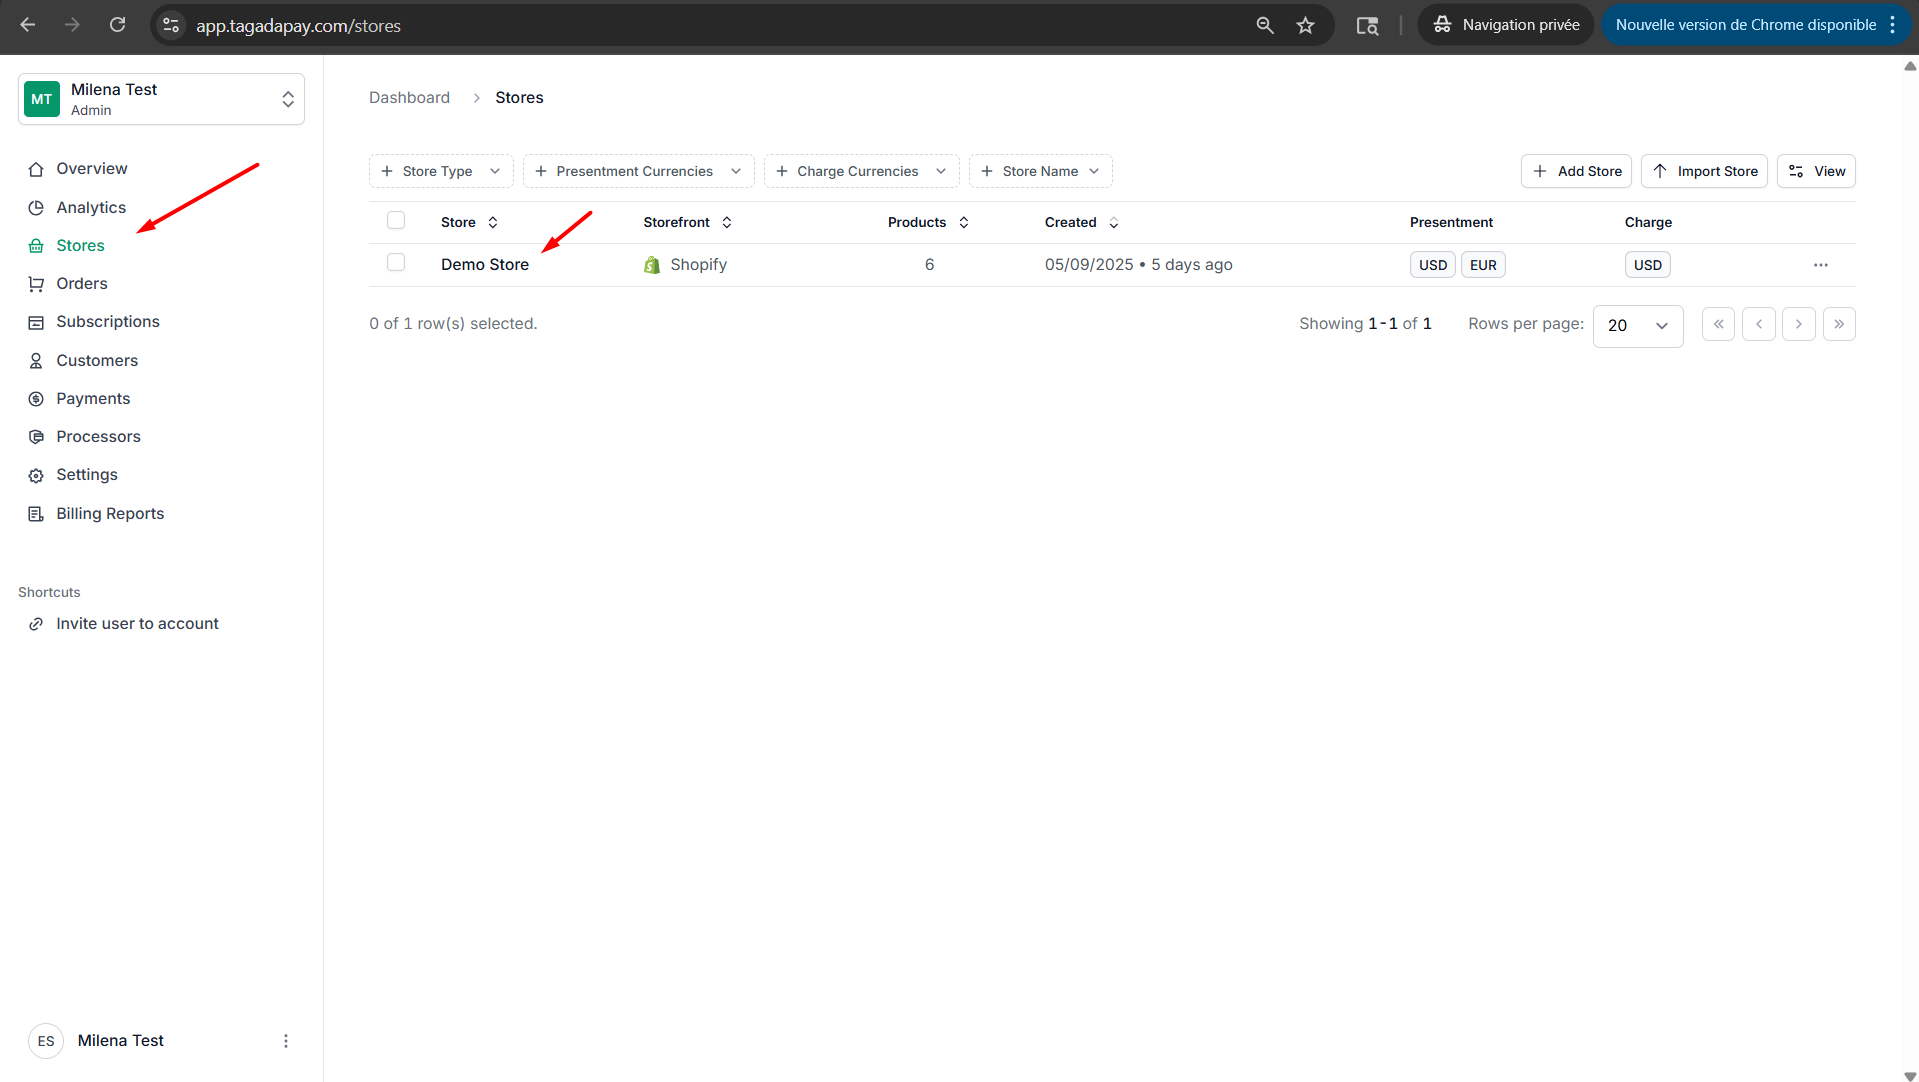
Step 1: Select your desired store under Stores.
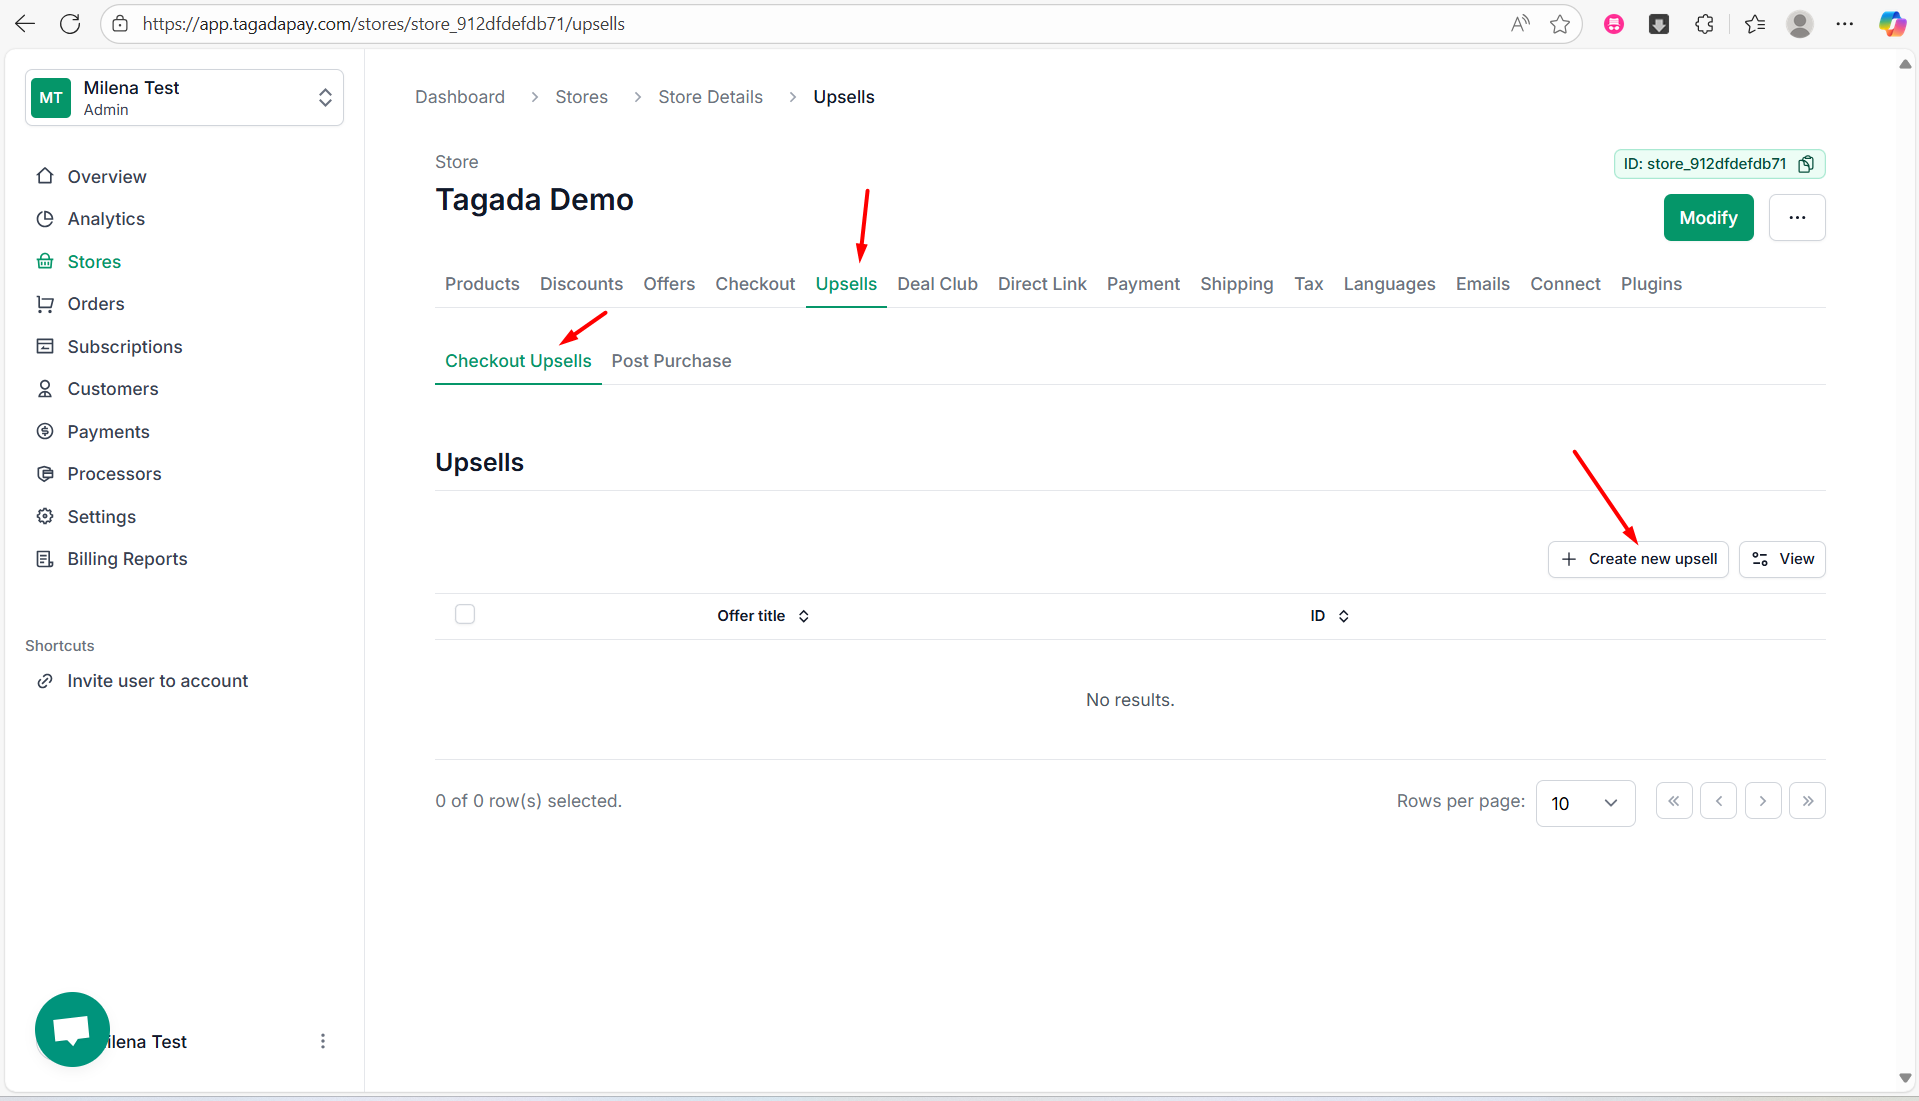
Step 2: Select Upsells tab, then under Checkout Upsells tab select Create new upsell.
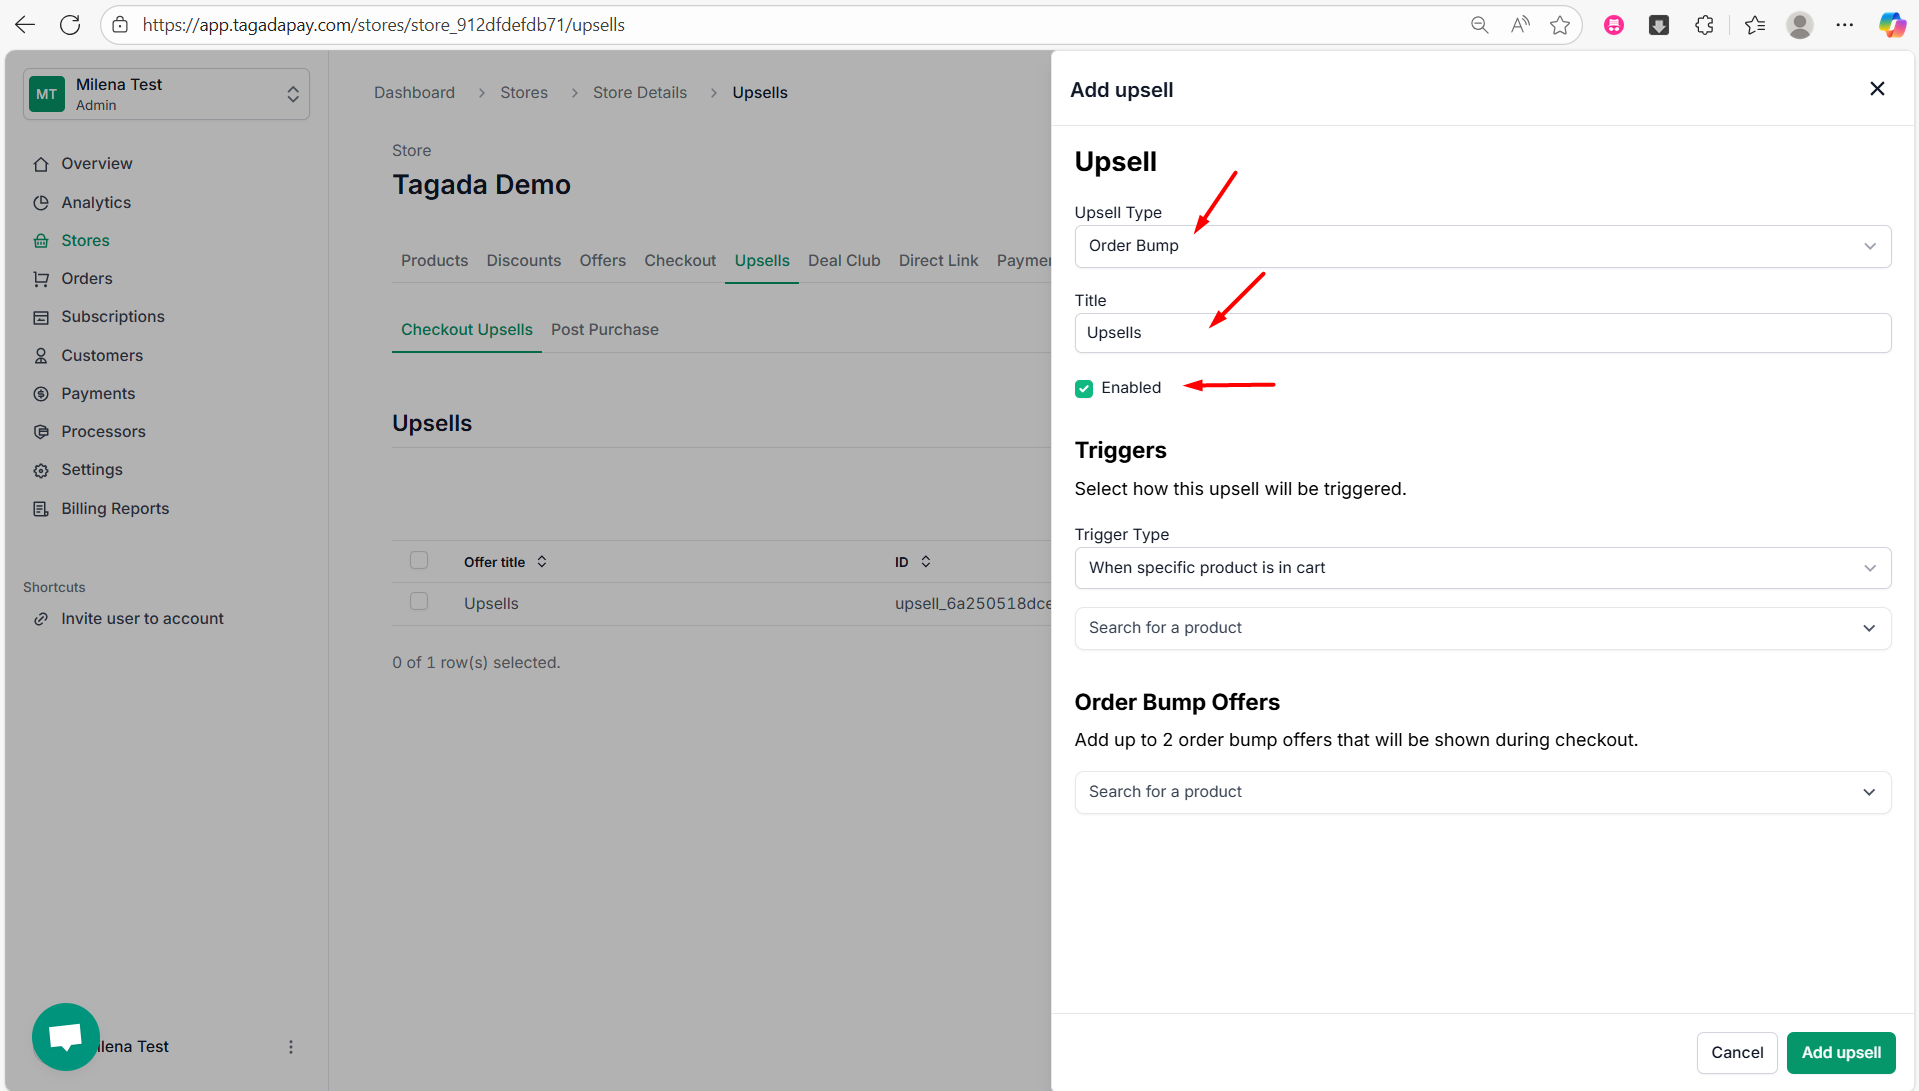
Step 3: Under the Upsell section, select the Upsell Type as Order Bump. Enter the Title for example Upsells. Check the Enabled checkbox if you want this upsell to be enabled.
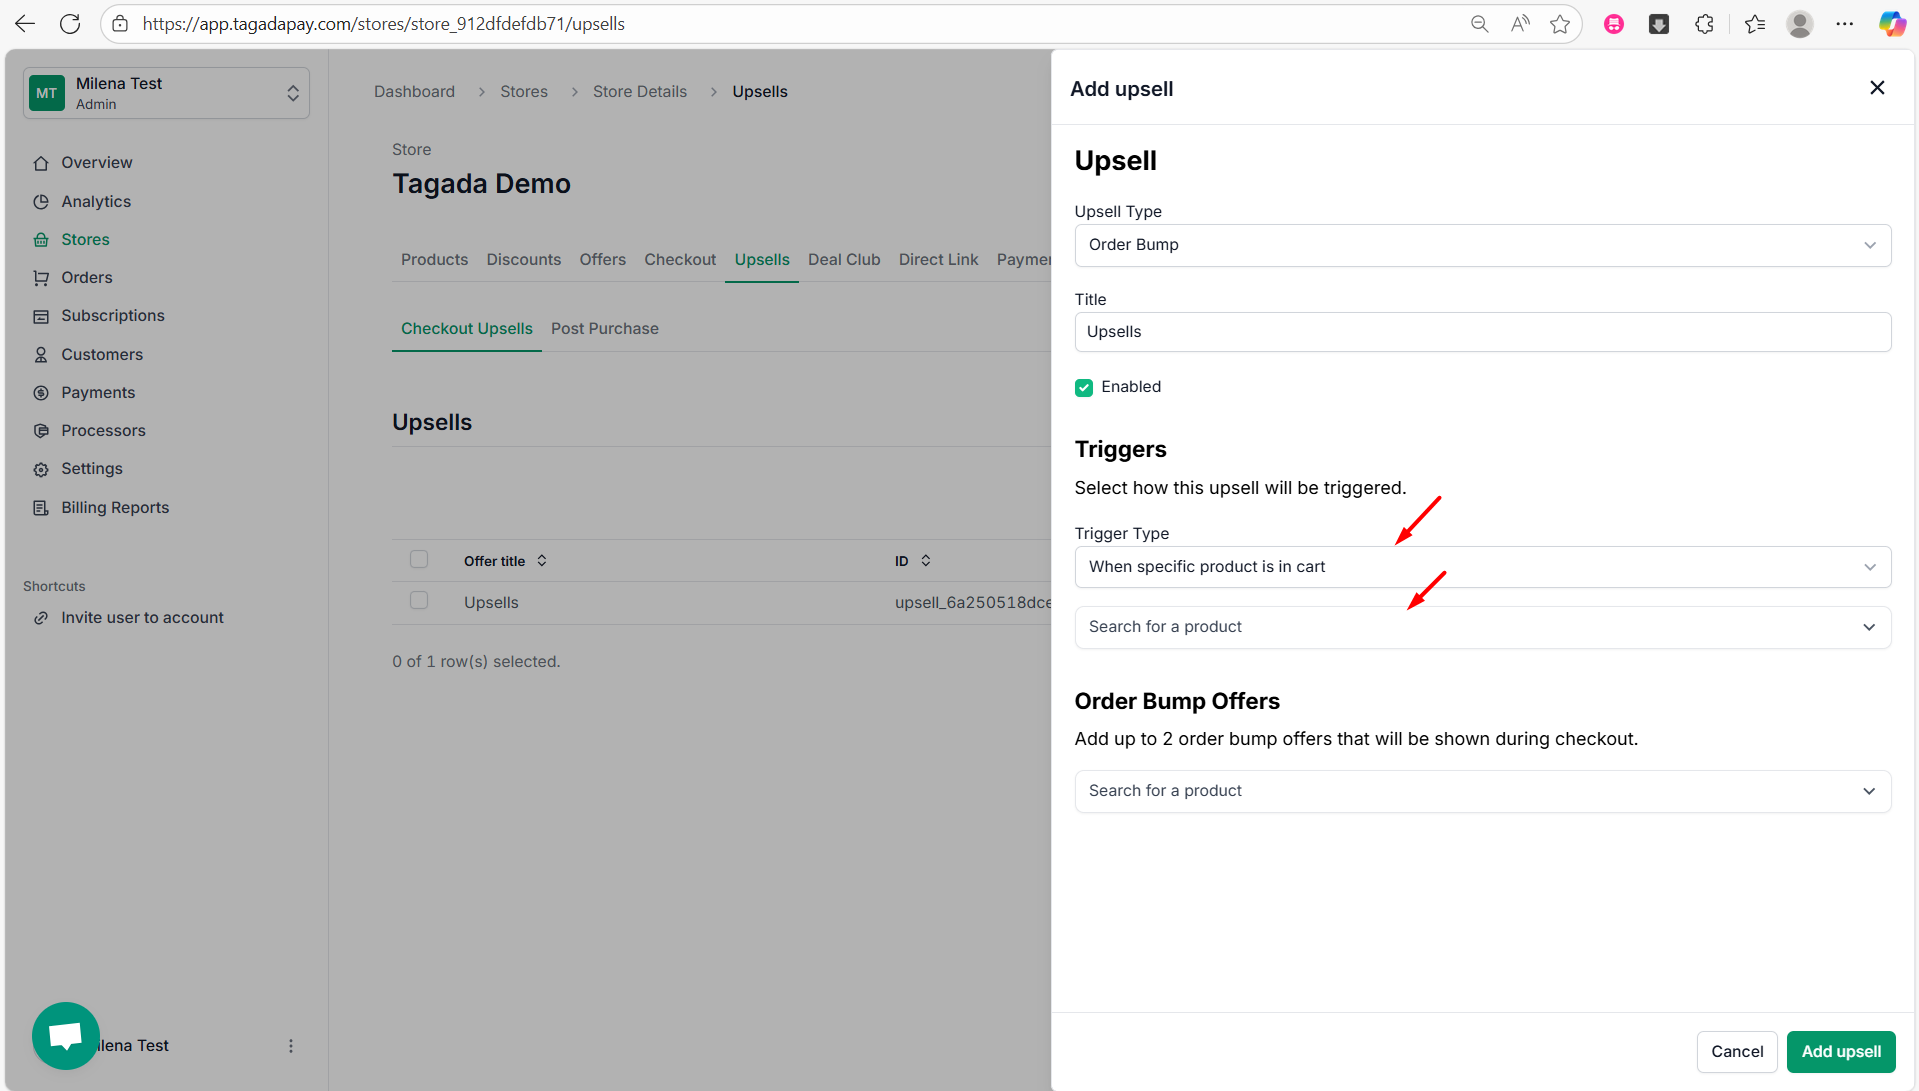
Step 4: Under the Triggers section, select the Trigger Type as When specific product is in cart. Search for the product that you would like to trigger the upsell and select it.
Step 5: Under Order Bump Offers, select the products you want to display as upsell options at checkout.
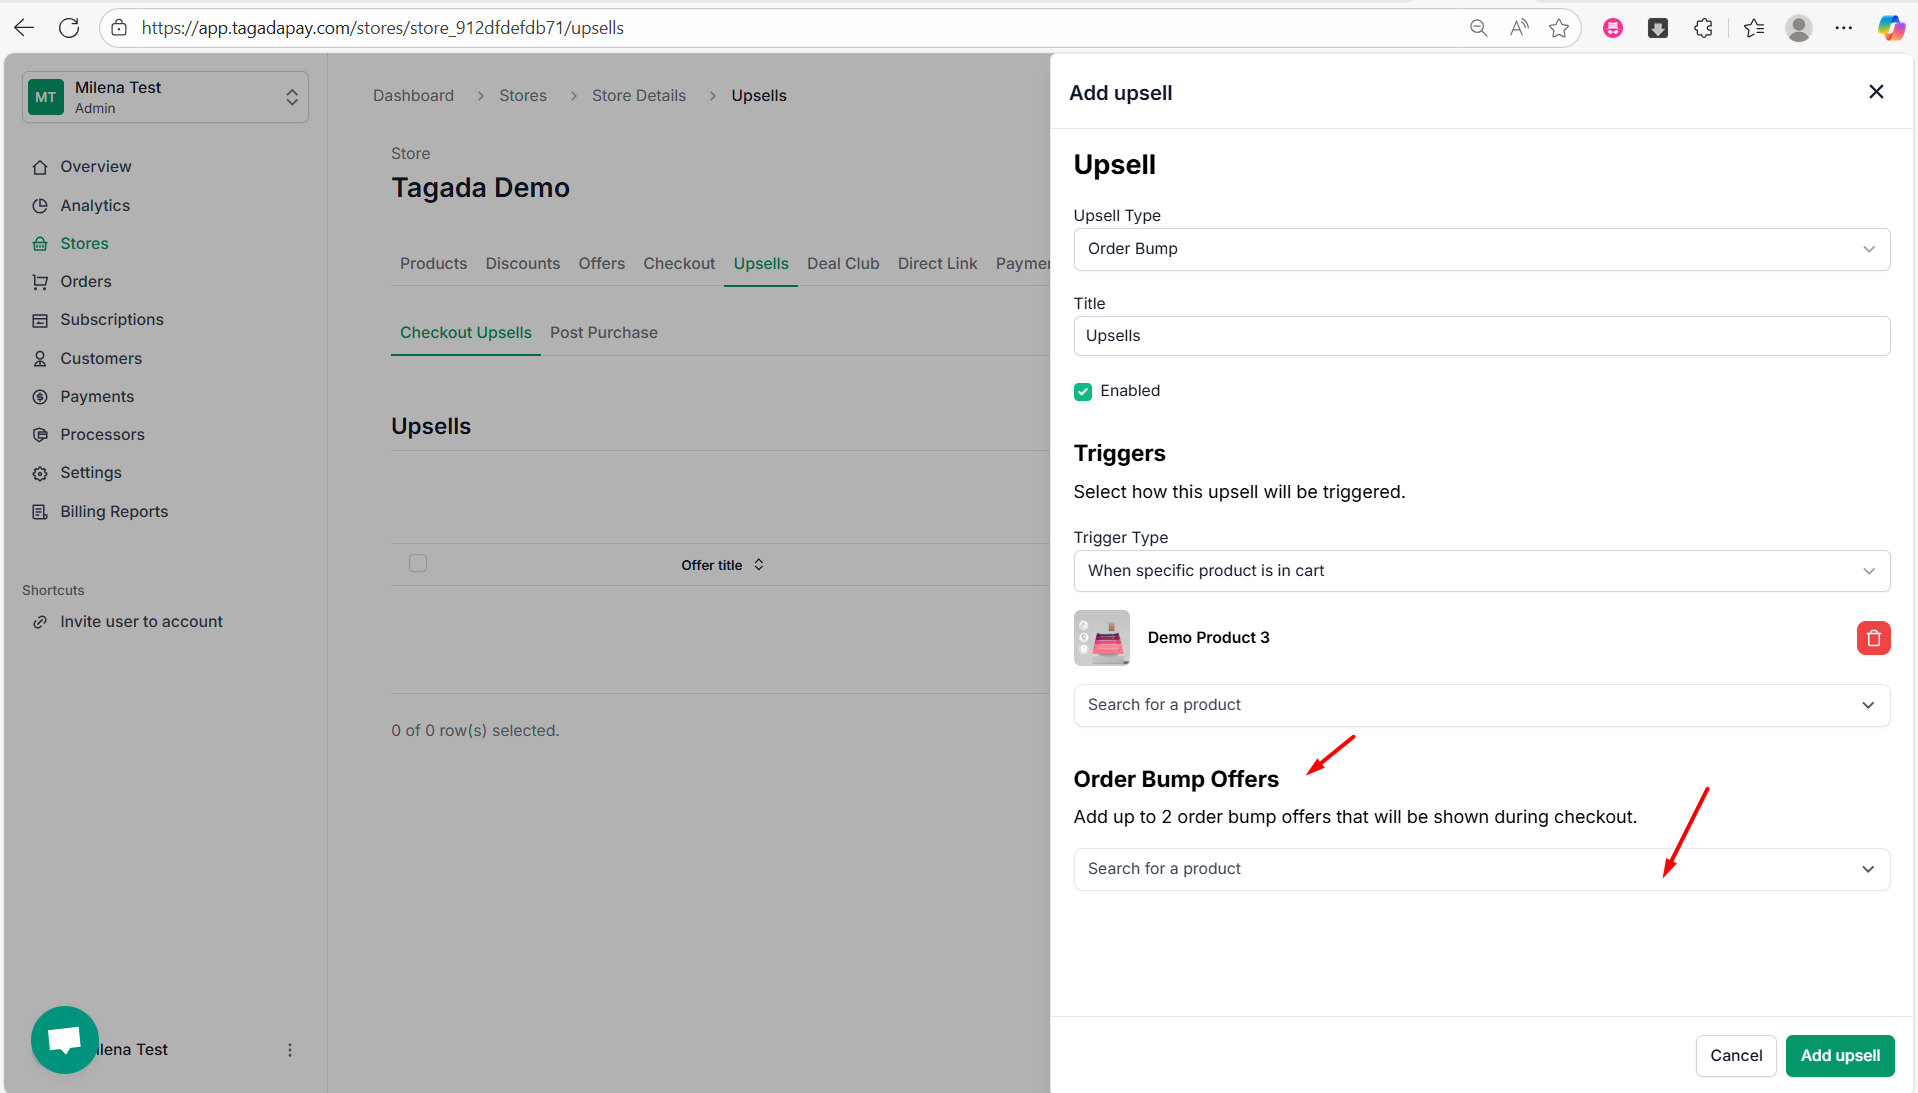
Note: You can add up to two order bump offers, which will appear during the checkout process to encourage additional purchases.
Step 6: You will need to chose the Variant of the product that will appear as the upsell offer, its Price and the Type of the upsell offer.
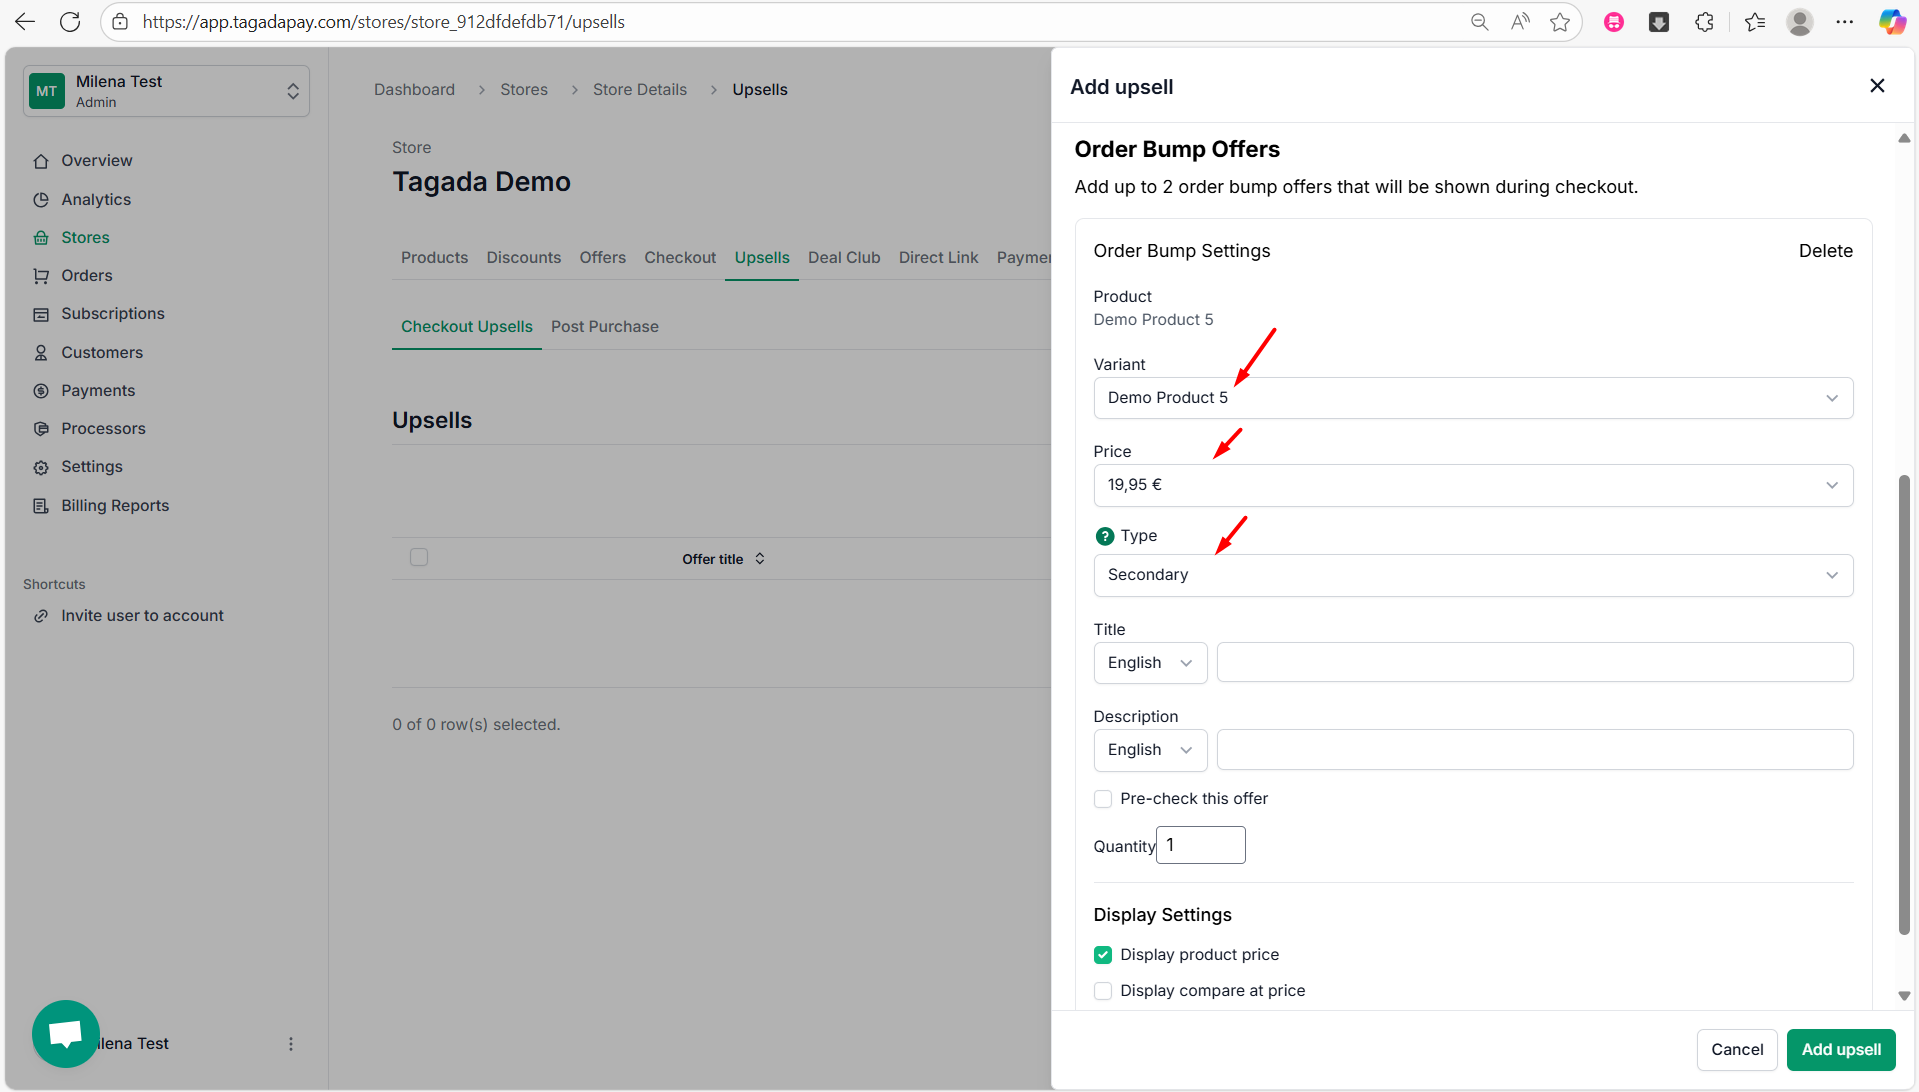
Note: Regarding the types of upsell offers, there are several options available depending on their placement at the checkout page:
Primary means the upsell will be displayed just below the payment button on your checkout page. You’ll also have the option to choose whether it is pre-checked or not.
Secondary means the upsell will appear on the right side of your checkout, below the order recap.
VIP means it will use custom buttons, which we don’t recomment using it.
Non interactive means it will be prechecked, non clickable and non visible at checkout.
We recommend you starting with the secondary option. And if you are adding the second upsell offer, select it as a Primary.
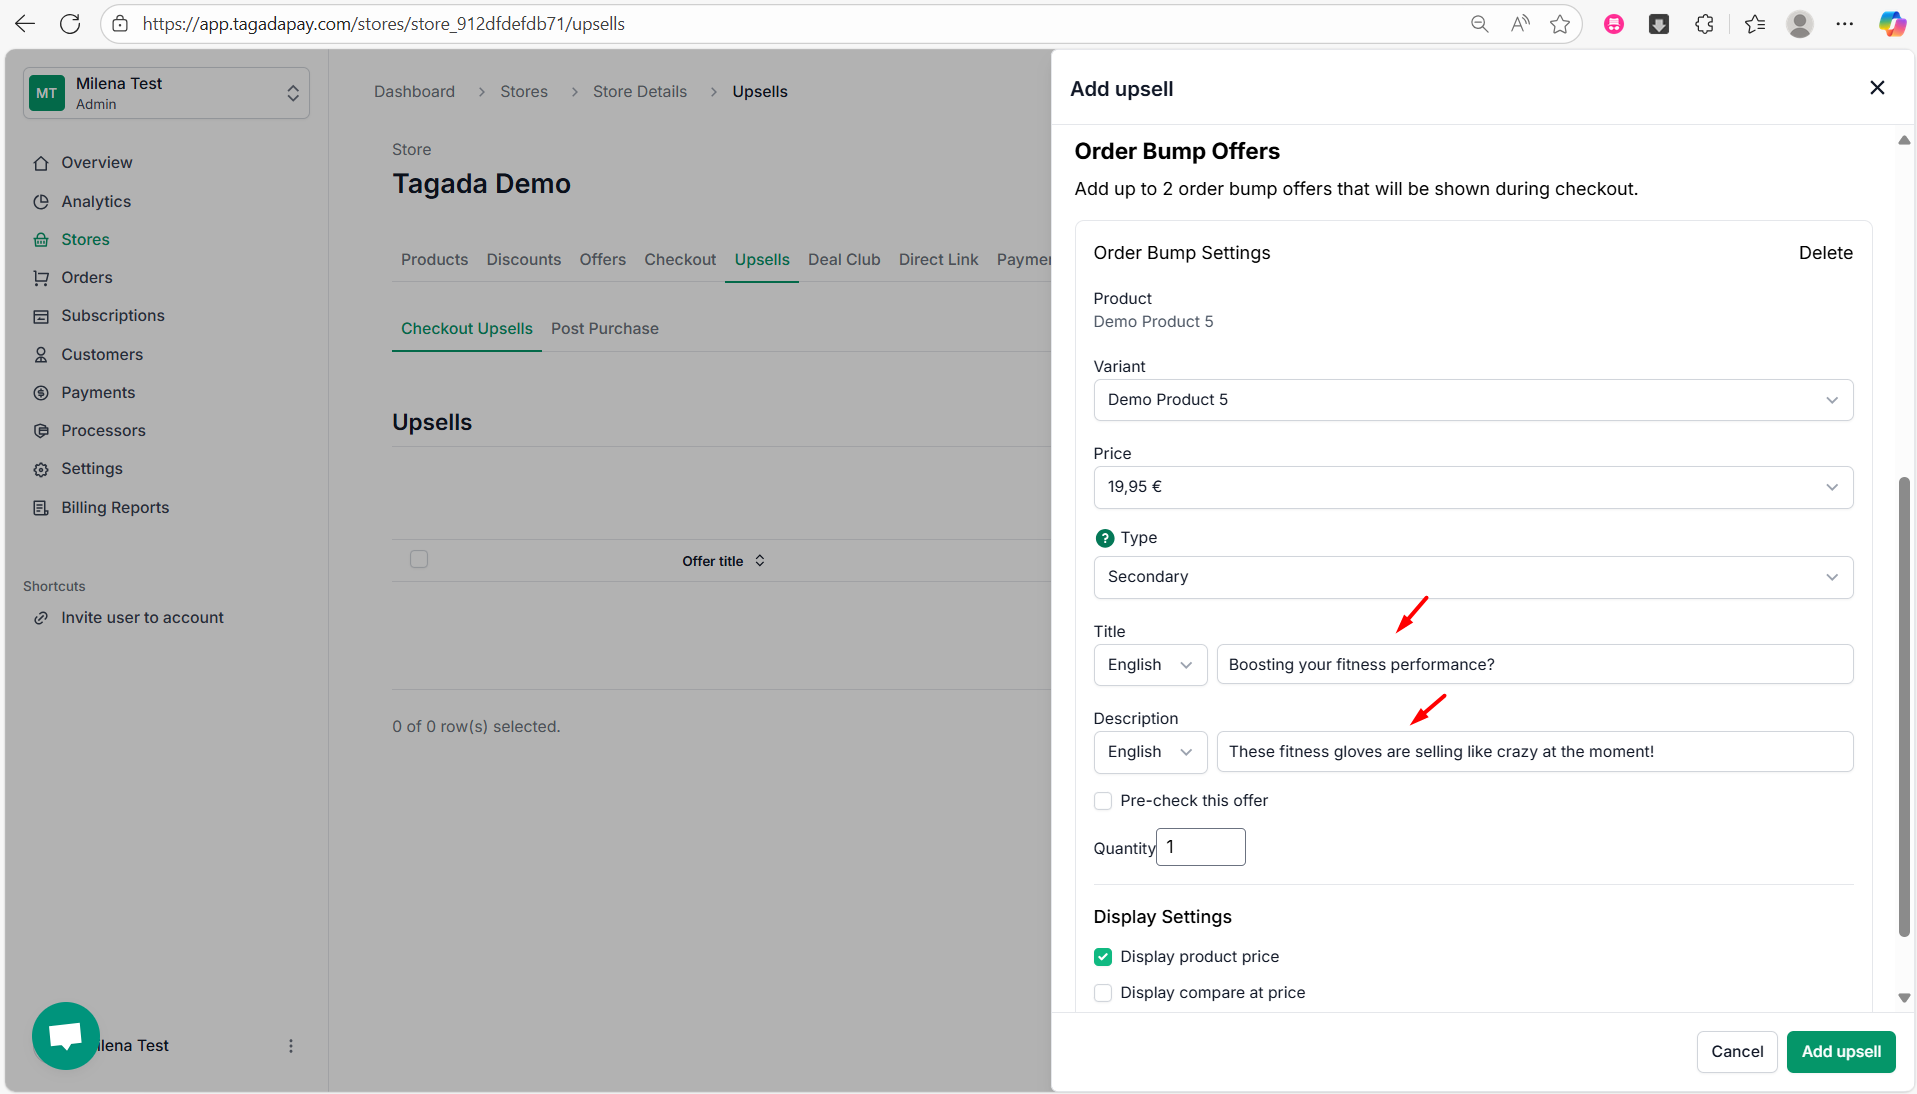
Step 7: Next, you can add an appealing Title such as “Boosting your fitness performance?” and a Description such as “These fitness gloves are selling like crazy at the moment!”.
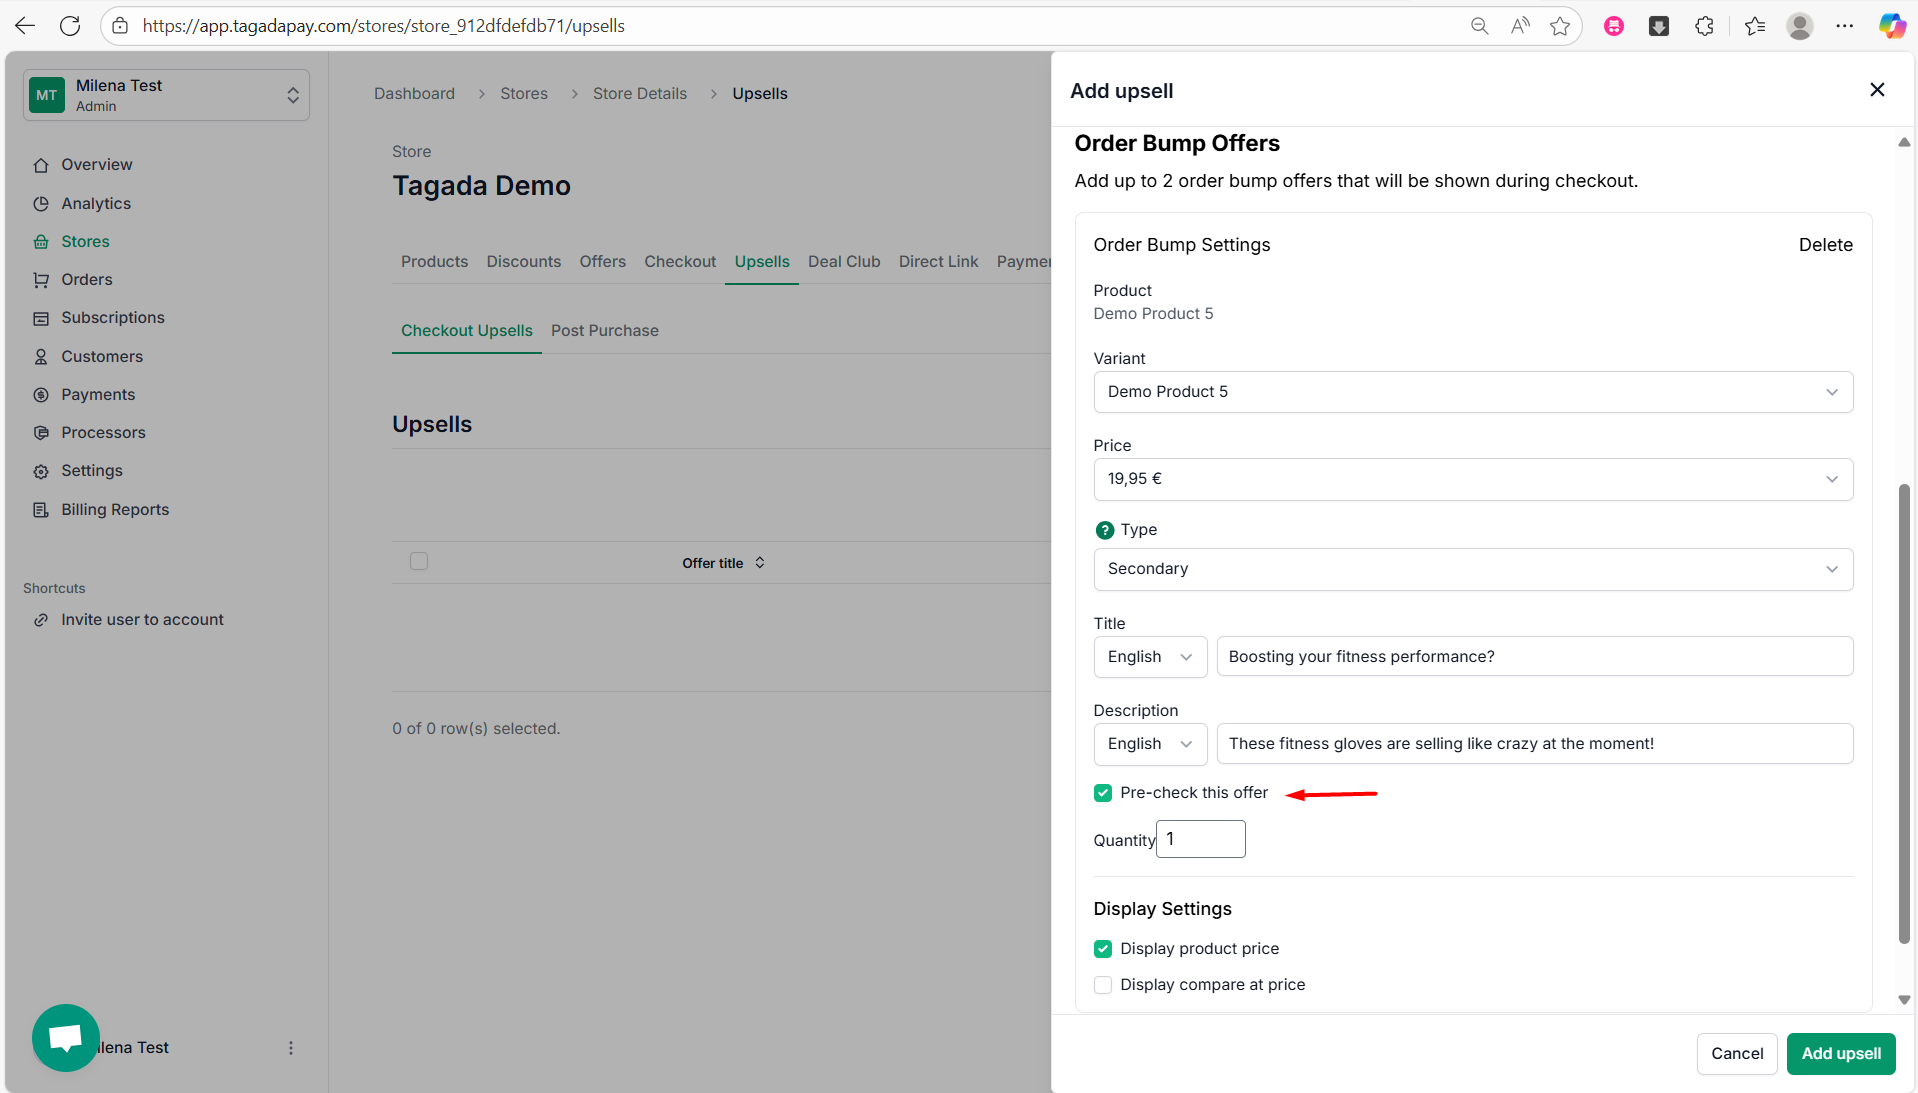
Step 8: If you enable the option Pre-check this offer, the upsell offer will be prechecked at checkout. You can also select the quantity of the upsell products to be added in the basket.
Step 9: You can choose whether to display the product price and optionally show the “compare at” price to highlight any discounts or savings.
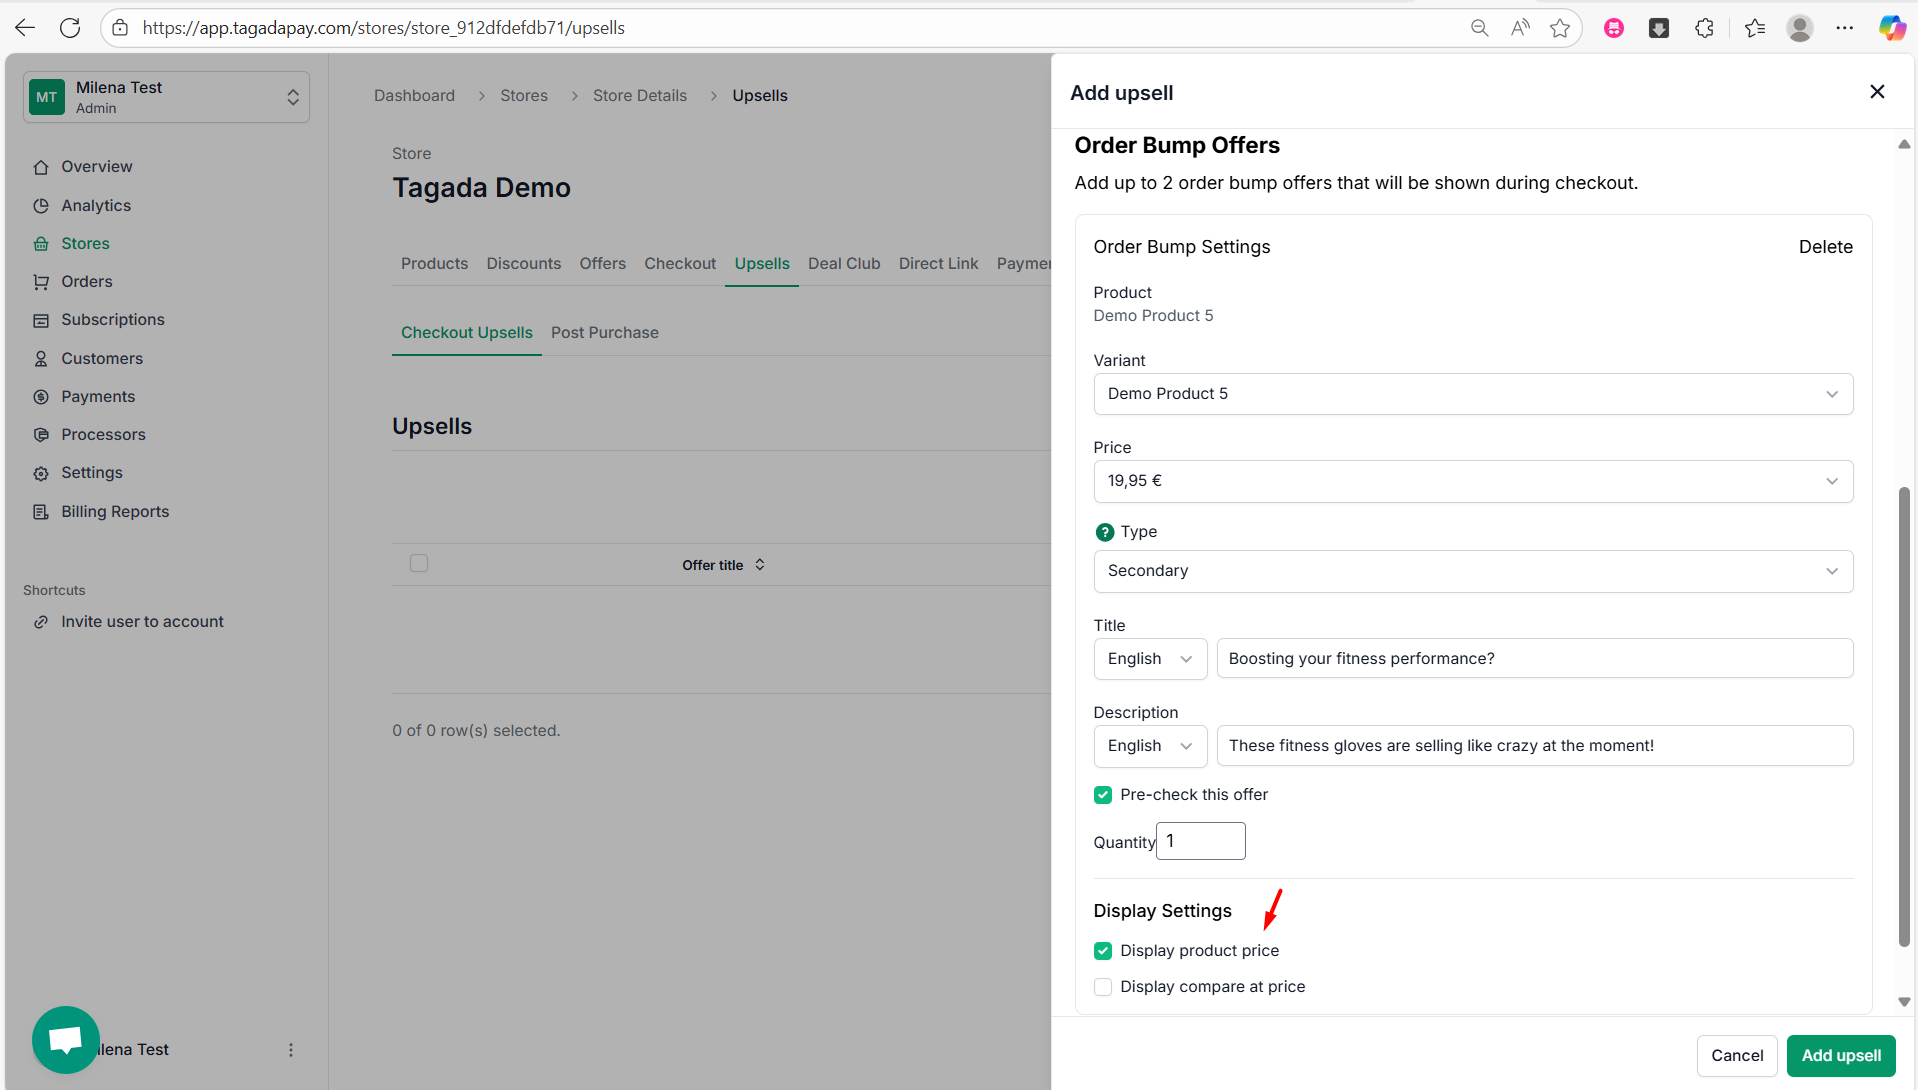
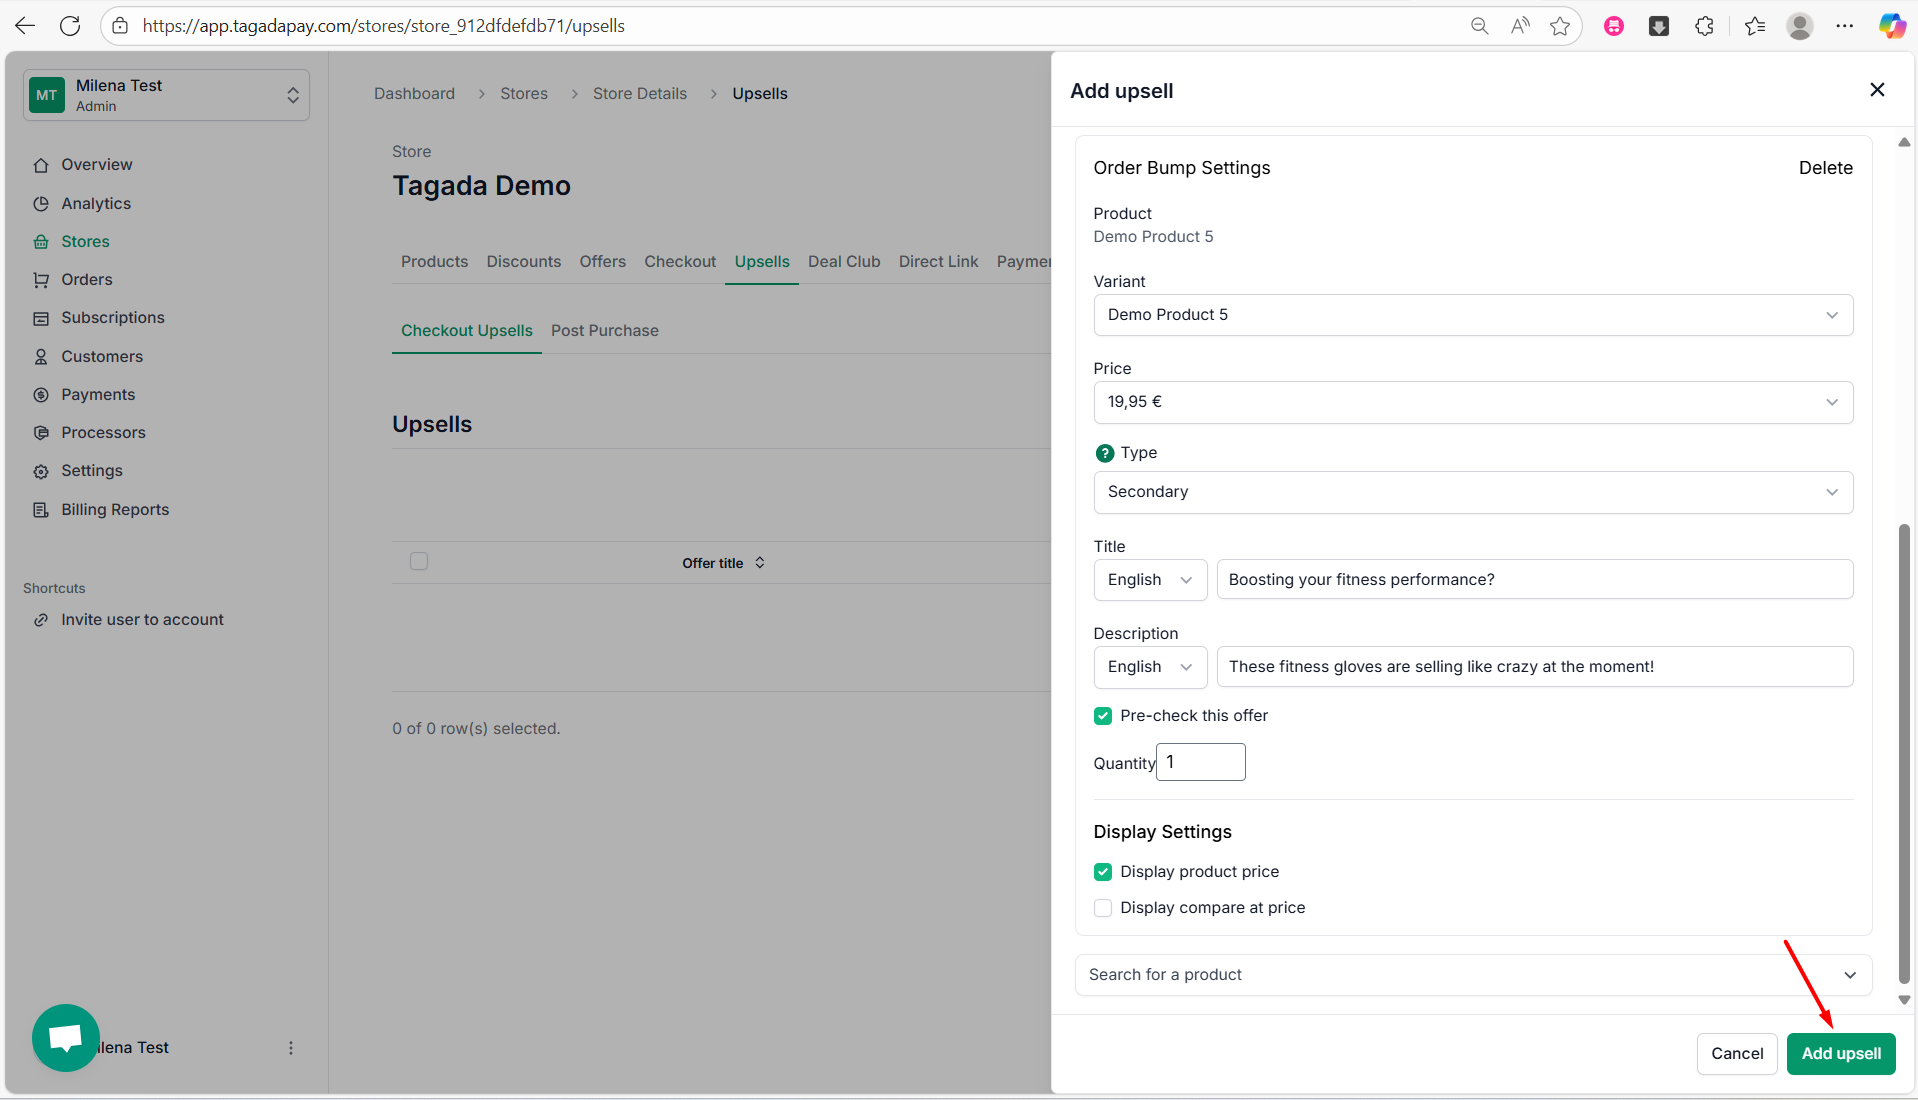
Step 10: In the next step, you can choose to add another upsell if desired.
If you're finished, simply click Add Upsell to complete the setup.
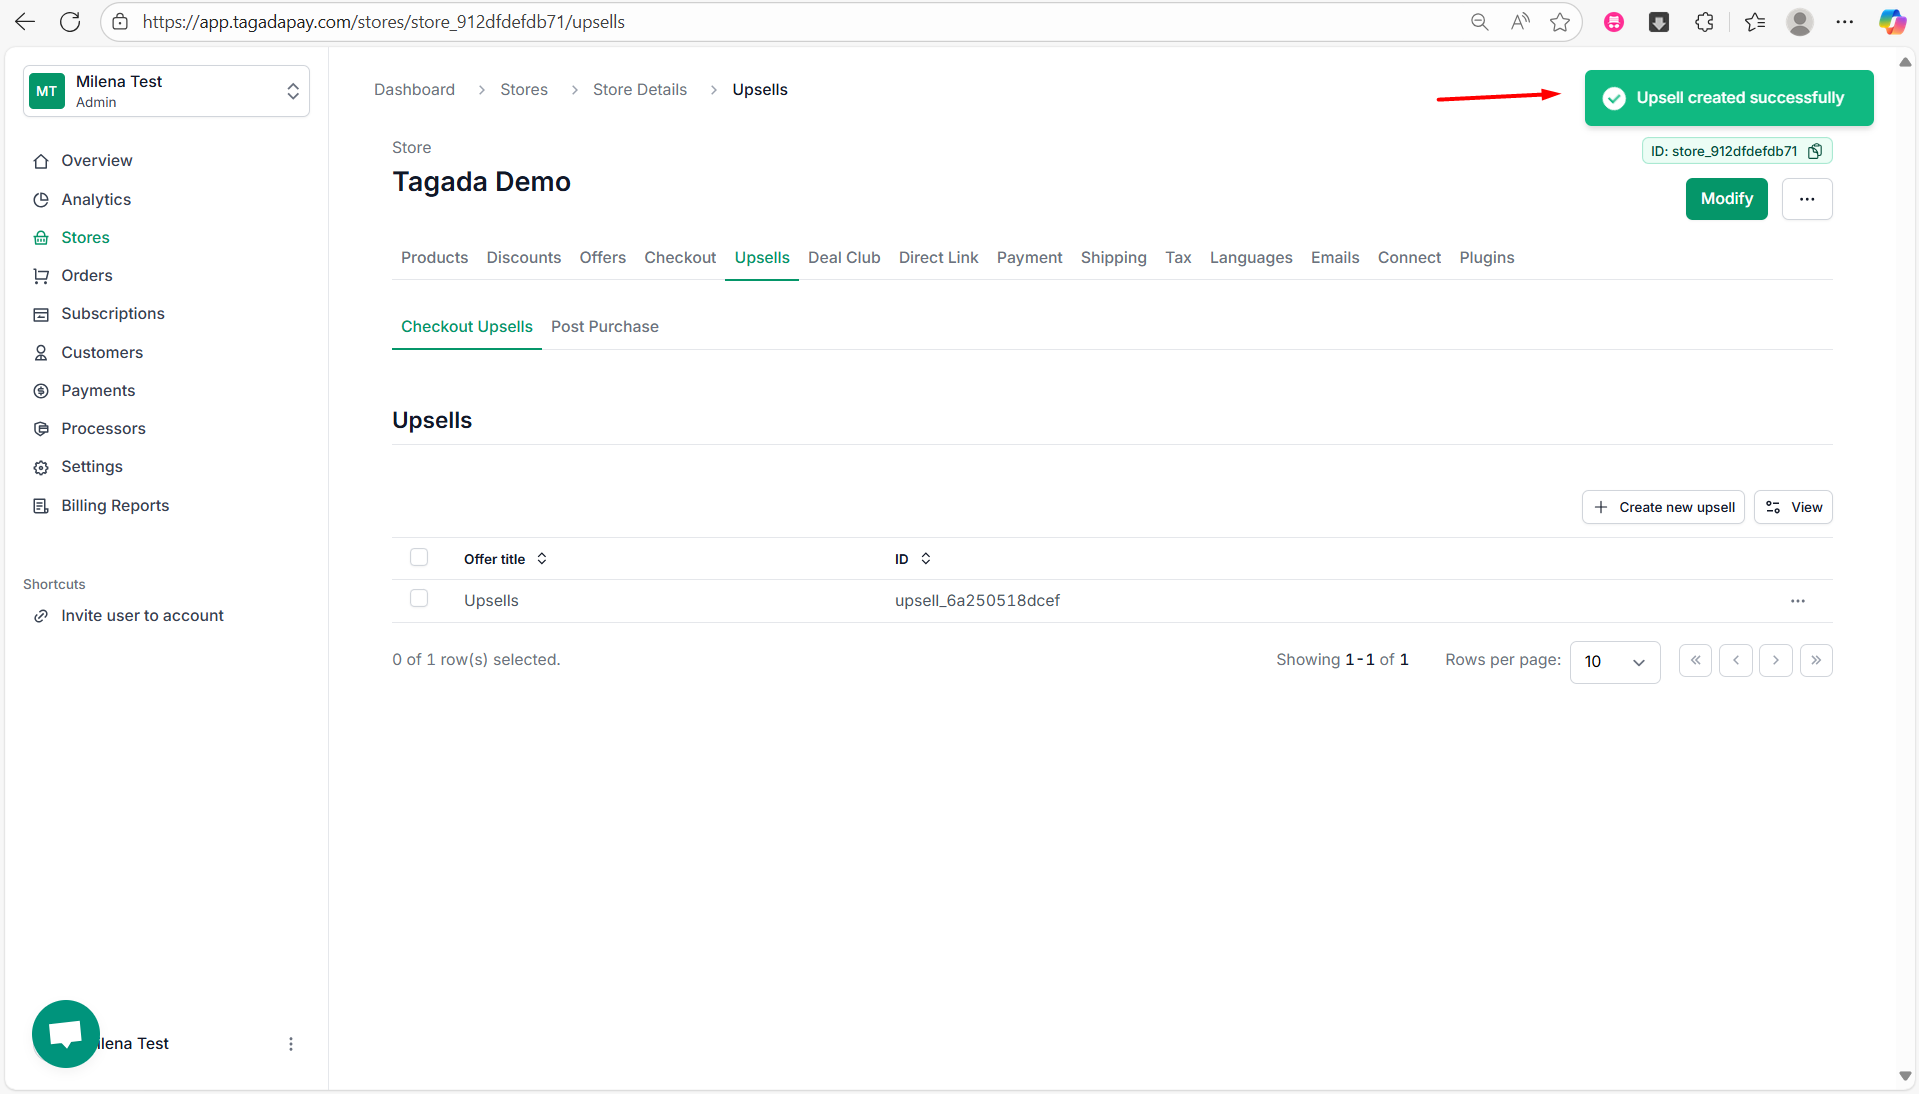
Step 11: A green confirmation message will appear, indicating that your upsell has been successfully added.
In the next chapter you can learn how to Add an upsell with the trigger condition to Always show the upsell.
In today’s competitive e-commerce landscape, maximizing average order value is more important than ever. One highly effective strategy to achieve this is through order bump upsells—a subtle yet powerful way to offer additional products or upgrades right at the point of purchase.
Note: You can set up your order bump upsells in your Tagada Checkout using one of the following trigger conditions:
Show the upsell when a specific product is in the cart – explained in the section below, or
Always show the upsell – covered in the next section.